For several years now, I have been under the impression that there were two different kinds of buttercups– 1. The true buttercups; 2. The weed known as buttercups. So, is there a difference? What is a weed, or what isn’t? I personally have been pulling these “weeds” out before they flower every spring.
Well, after much research, I have found out this is your everyday common meadow buttercup. And it is EVERYWHERE. Like it or hate it, it’s there. Some gardeners love the color they give to the garden during the “in-between” phase of the growing season (I like to call it the shoulder season– the bleakness between spring and summer blooms). Others like me try to rid our flower beds of this rather troublesome plant because it does take over any area if you let it.
Here are a few facts about the Meadow Buttercup:
Plant Family: Ranunculaceae Family (Ranunculus)
Number of Varieties: Between 1700 and 2000 worldwide
Fun Fact: They are heliotropic– they move throughout the day to follow the sun
Many varieties of buttercups are an important food source to animals, so please don’t think all of them are a nuisance.
If you are a gardener who wants to limit the amount of these beautiful flowers in your garden, I would as soon as you see their little leaves start shooting up, I would pull them up and make sure to get their roots, because if you don’t, they will come back!
I don’t know about you, but every spring, when all the bulbs come up that I planted the prior fall, I always take inventory and see where there needs to be improvement. For example, if I see holes where there should be some bulbs coming up, I take pictures on my phone so I know where I need to add some in the fall. I also observe where this is no early spring color– which is where Hyacinths come into the picture. I noticed on my back garage wall, I have alliums on the way, but now flowers at all. However, the fence that bumps up against my neighbor’s yard is a cacophony of color and scent.
I had never realized just how beautiful smelling hyacinths where– especially when you have planted several together! Hyacinths have one of the most beautiful smells in the early spring garden. l took a mental note that I must plant hyacinths behind the garage so there can be a nice balance of color and scent throughout the garden!
About Hyacinths
Early spring flower bulb
Has a wonderful, bold scent that reaches long distances.
Comes in a variety of beautiful colors.
They are good in the garden and a container.
They are deer resistant.
This particular hyacinth to the left has black stems, making this variety to be very bold and stunning!
These low maintenance beauties should be front and center in your spring garden, that’s if you live in a gardening zone that permits bulb planting.
Because they are an early spring bloomer, they love the cooler temps that comes with that part of the season. In fact, the cooler the weather, the longer the bloom time is extended. That’s probably why they have done so well in our neck of the woods this spring… it has been a cool one for sure!
What has been your experience with hyacinths? I strongly urge everyone to add these to their garden as soon as they can!
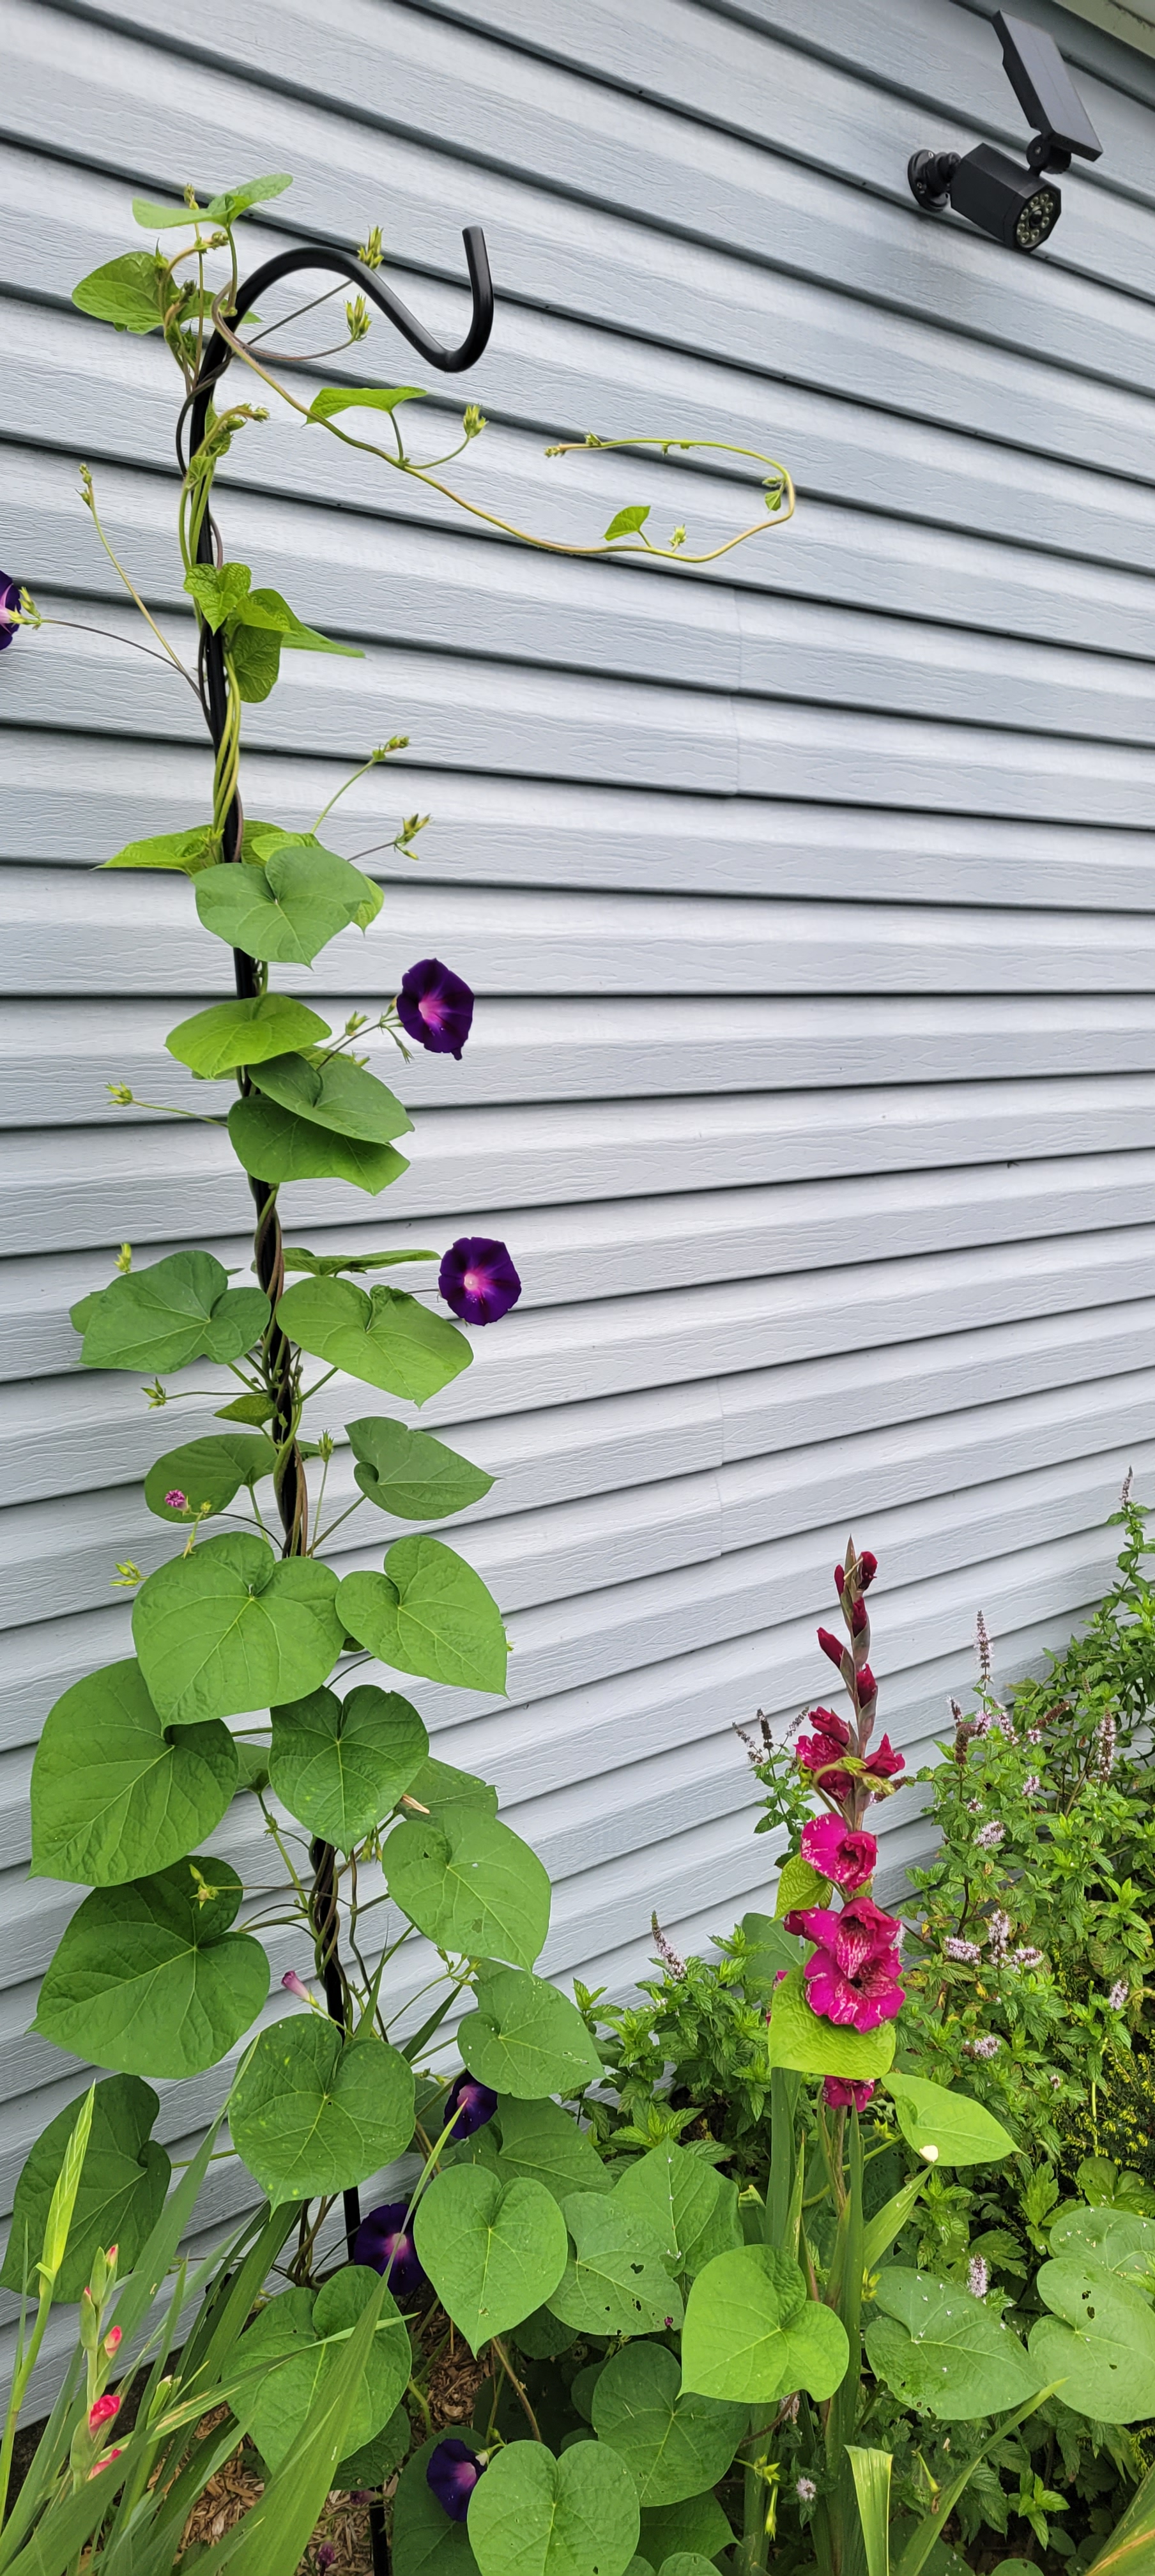
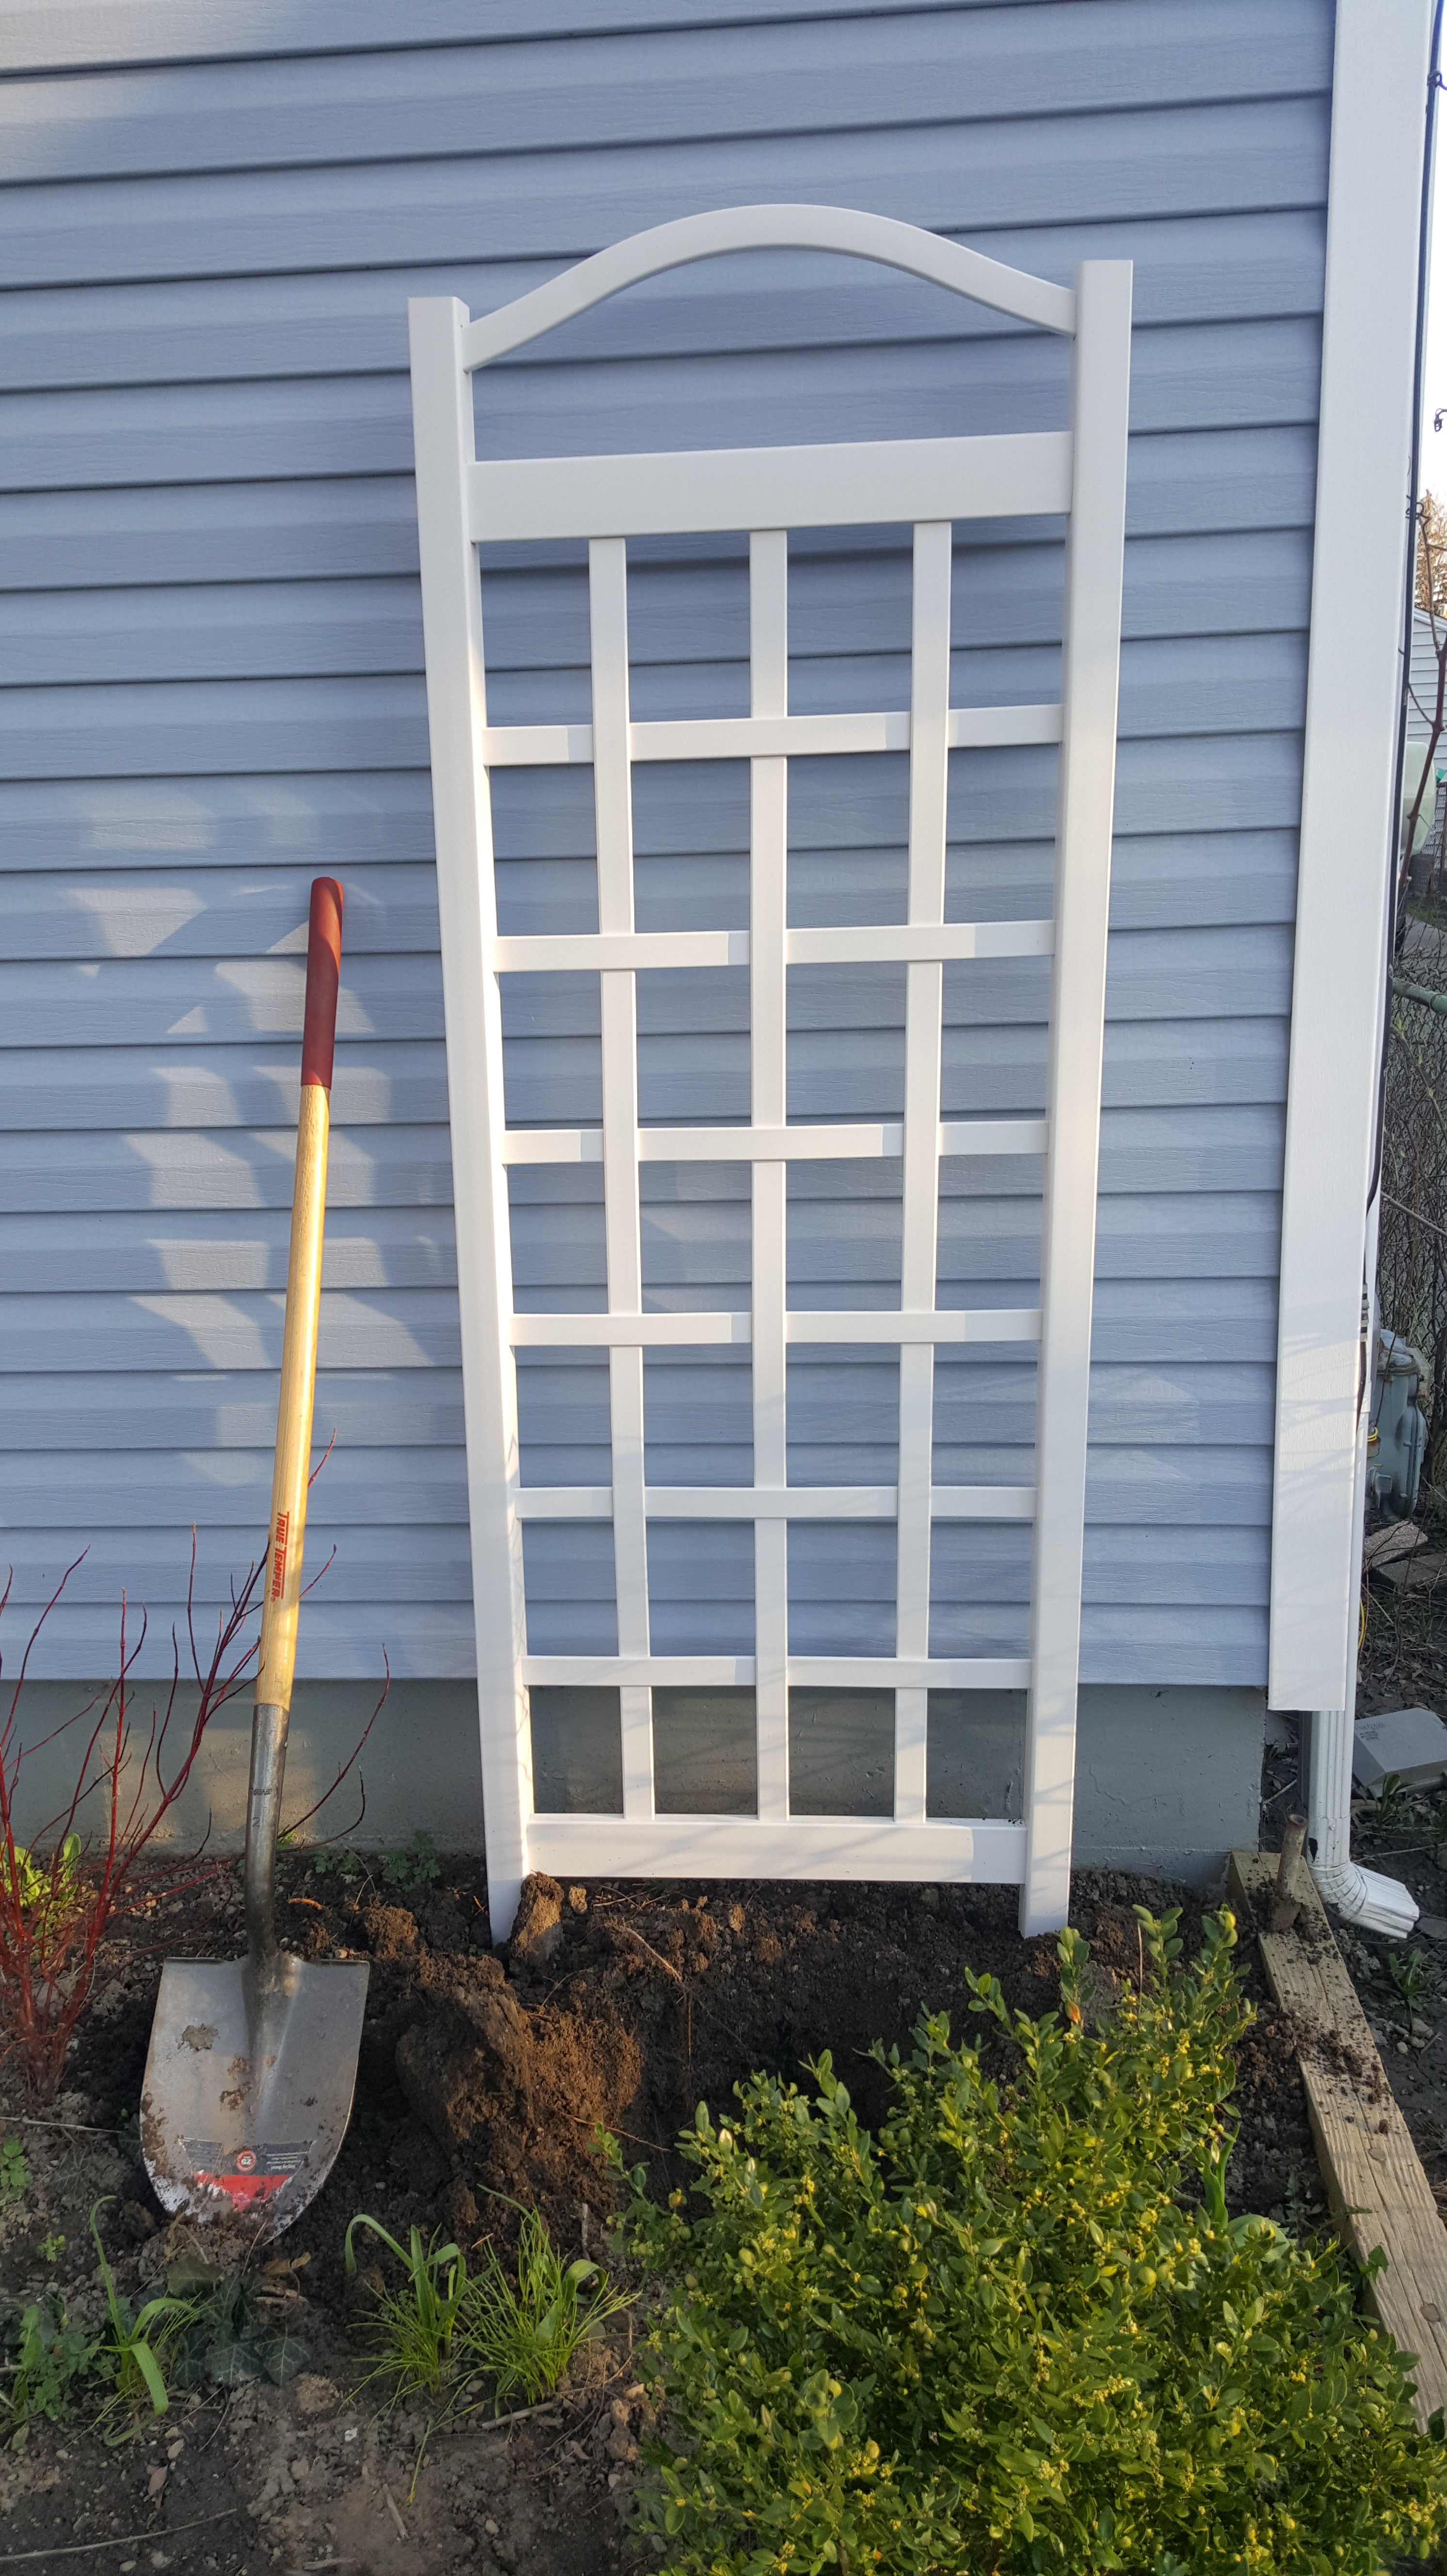
Shepard’s hooks in the garden go way beyond just hanging plants. I have also found them to be great for small climbers such as the morning glory. I discovered this after watching a random morning glory (we all know they have NO problem growing from seed), start curling and twining its way up my Shepard’s hook that had a beautiful petunia basket on top, it dawned on me that this very simple garden tool is actually way more practical than first thought!
So, if you have any small climbers that need a little more support, and you don’t want to necessarily get a trellis, I would highly recommend getting a low price-point Shepard’s hook. It adds another practical (vertical) element to the garden!
I thought this would be little “introduction” back to garden blogging. It’s been a while, and I have felt the itch to start talking about my garden and plants again!
Goodness, I went through two seasons without posting one thing! Don’t for a minute think that I haven’t been in the garden– we just had a few other things going on this year that kept me from normal blog writing.
In April, my family purchased some land with a small cabin on it– that was one of scariest things, honestly, I have could ever think of doing. The thought of all the work that had to be done was daunting, and downright terrifying. But, it ended up being one of the best things we could have invested in, and we spent those two seasons learning the land and led me to learning about the different specimens of trees that call our little plot of the world “home”.
Early morning picture in August. We have accomplished a lot, but have much more to do!
It’s been really interesting to learn the different types of trees we have, including Larch, which, I always admired from other places, because of the way it’s needles change color in the fall. Here was a little baby tree that was right next to our driveway.
The Larch tree can be seen in both summer and late fall.
Now, my big project is to figure out what trees are good for windbreak, but not big enough to block our sunlight, as we are powered by solar energy. So much to learn– getting there little by little! Stay tuned for some more adventures in the woods!
Now, back to regular gardening– yes, I did a lot of moving around in the garden again this year, to enhance growing performance for some plants–and it worked!
I am trying to work towards a “cottage” feel in the ‘burbs. I created rock borders for my garage and front yard.
Garden Takeway:
Just because something in your garden doesn’t seem to be doing well, doesn’t mean it’s dying. Try moving it to a sunnier, shadier location–depending on the plant, of course.
My dahlia haul was fruitful this year. I tried a variety pack on a whim, and they turned out better than I expected! I highly recommend to everyone who doesn’t grow dahlias to try– having beautiful blooms all the way into October really makes the growing season feel longer–and how sweet it is to have fresh blooms to cut in the fall!
Well, I hope this sums up two seasons good enough. I am putting together a holiday gift list that will include items every gardener/outdoors enthusiast will need!
As most of us are sitting inside because the wind chill is sub zero, and the snow keeps coming. We gardeners are daydreaming of spring. I mean, I just received my David Austin® rose catalog, and the 8 degrees that my phone keeps telling me is not making things any better. We are nearing mid-winter, and that means we are ready for it to end!
One day soon the garden will be green and lush again!
We must keep in mind that cold and snow is an important part of the gardening process. I am not going to ignore the fact that winter can kill a lot of stuff in the garden, and can cause a lot of damage, but when you get right down to it, gardens need winter to get through the growing season.
Here are some quick thoughts to think about on this winter day!
Snow:
Gives the necessary moisture to plants, bulbs and a variety of critters that are tucked away for their winter slumber.
Helps big organisms (frogs, earthworms, turtles) in their hibernation/life cycle, and small organisms (bacteria, amoeba, fungi) that are working overtime to make your soil rich and nutritional for your plants and trees.
Is a great insulator for all of plants and organisms.
Before you know it, the snowdrops and hellebores will be pointing their little heads to the sky, reminding us all why spring is sweeter because of winter!
I am not even going to talk about how this year has flown by, or how it has been since May since I have last blogged. Life has been full and good, and trust me, I have not stepped away from the garden– I have been still digging, growing and learning new things.
I am at the point where I have pretty much quit adding to my garden (there are just a couple things I want to add this year), but maintaining and working with what I have. As I mentioned in my wrap-up post from last year, I went plant crazy in the beginning, and I paid for it. A lot of them did not come back after one season, so instead I am moving the plants I have to either 1. Give them more space, or 2. Make my garden beds look a little more put together.
In October, I worked on this bed. I extended it so I could bring more full sun-loving plants over here.
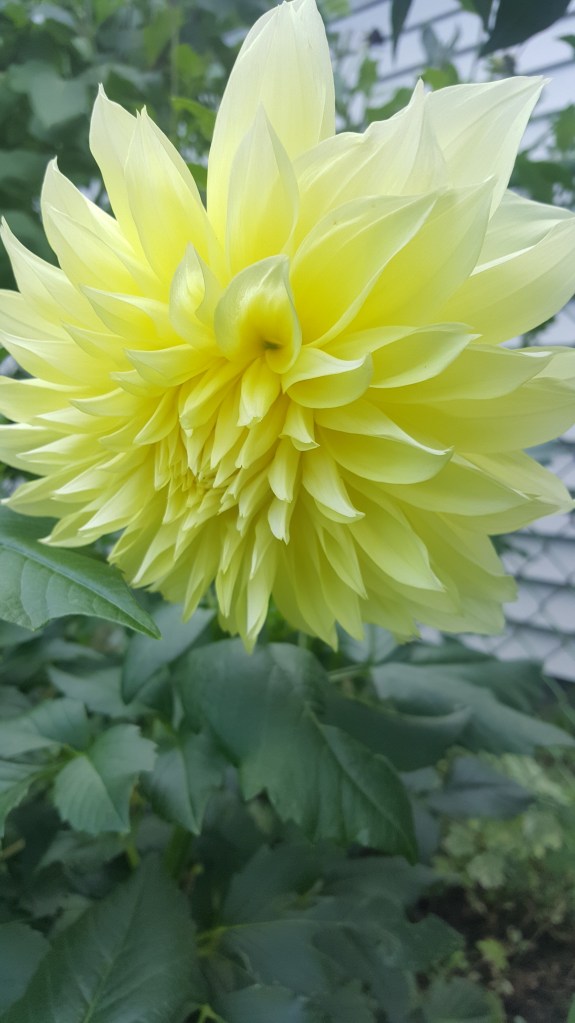
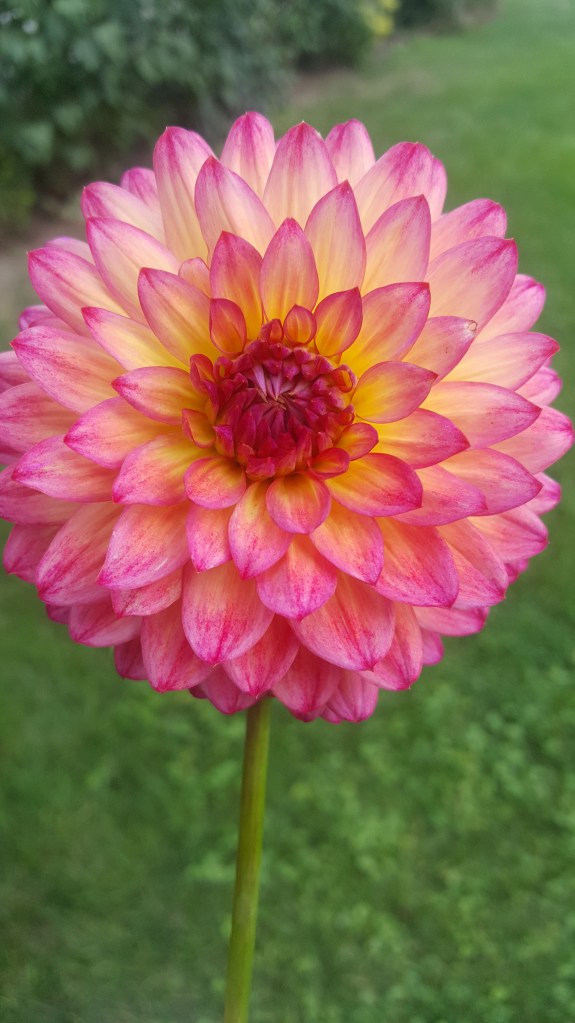
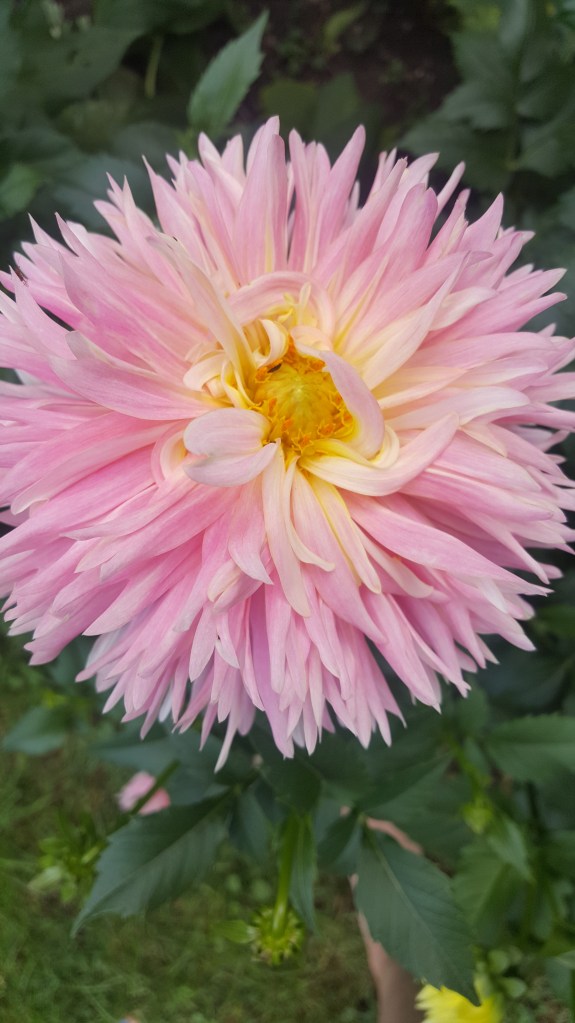
As I mentioned in my only couple of posts earlier this year, I had Dahlia tubers from last year that I planted, along with some new varieties. Here were my results:
My dahlia tubers I had from last year did not make it. I put them in the ground at the same time as my new dahlia varieties, and when they weren’t coming up, and the others were, I dug them up to find mold on them. I was disappointed because I overwintered as I was advised to, but it just didn’t happen. I have also read where some people just treat dahlia tubers as annuals. I thought I would try again this year, and if they didn’t come up again, I too, will be just buying new tubers every year to give me one less headache!
My new dahlia varieties this year were beautiful. I have caught the dahlia bug! I am now wanting to try many different new varieties. I am going to make more room for dahlias this year. I love how many blooms I get, and I love cutting them every morning before work to have fresh blooms in the house and to give them away to neighbors and co-workers.
Clockwise from top left: Cafe Au Lait, Kelvin Floodlight, Burlesca, and Nadia Ruth.
I loved all the varieties I planted, but of course the “Cafe Au Lait” did not disappoint, which is why I plan on buying more for my little cutting garden this year. What was the biggest surprise was the “Nadia Ruth” variety, it blew me away and I got the most blooms from that. One variety did not come up for me at all, and that was the “Creme de Cassis”.
The “Burlesca” variety was marketed as a honeycomb shaped flower, but that was not the case at all. Still beautiful, but not what it was supposed to be.
My rose:
It did not bloom this year. I planted the David Austin Rose “The Pilgrim”, and it grew on my trellis, just never flowered. I am hoping this year it will, as with our 6-month winter last year might have had something to do with it. Fingers crossed!
So, looking ahead– I am going to concentrate on mulching all of my beds this year, and adding more dahlias. I also would like to purchase one more David Austin rose, and then really start “landscaping” my yard. Now that I have a bulk of the planting done, it’s time to give these beds some shape and definition!
I hope you all have a nice New Year, I look forward to getting back to business with blogging all of my outdoor and gardening adventures. I post on Instagram most often, so, feel free to take a look when you get a chance!
It has been wayyyy to long since I have last blogged! We have had a lot going on in our home– since March, we have been laying down new flooring in phases– which, we finally finished this past weekend! That, and winter being sooo longggg here, it’s been a tough few months, but I got back in the garden this past week, and I have learned quite a bit!
I bought my first Davin Austin® Rose this year! My plans were a little loose as far as the garden was concerned, but one of my major plans was to plant a rose. I splurged and purchased my new “The Pilgrim” rose in February, and they mailed it to me two weeks ago!
Photo source: David Austin Roses
Here’s a little bit of information about The Pilgrim:
As you can see above, it is a beautiful yellow climbing rose. Climbing roses to have bigger flowers and don’t grow as fast or vigorously as rambler roses.
It does very well in shady areas— particularly North facing areas, which, I was thrilled about, because I planted the rose on the front of my house, which happens to be North facing.
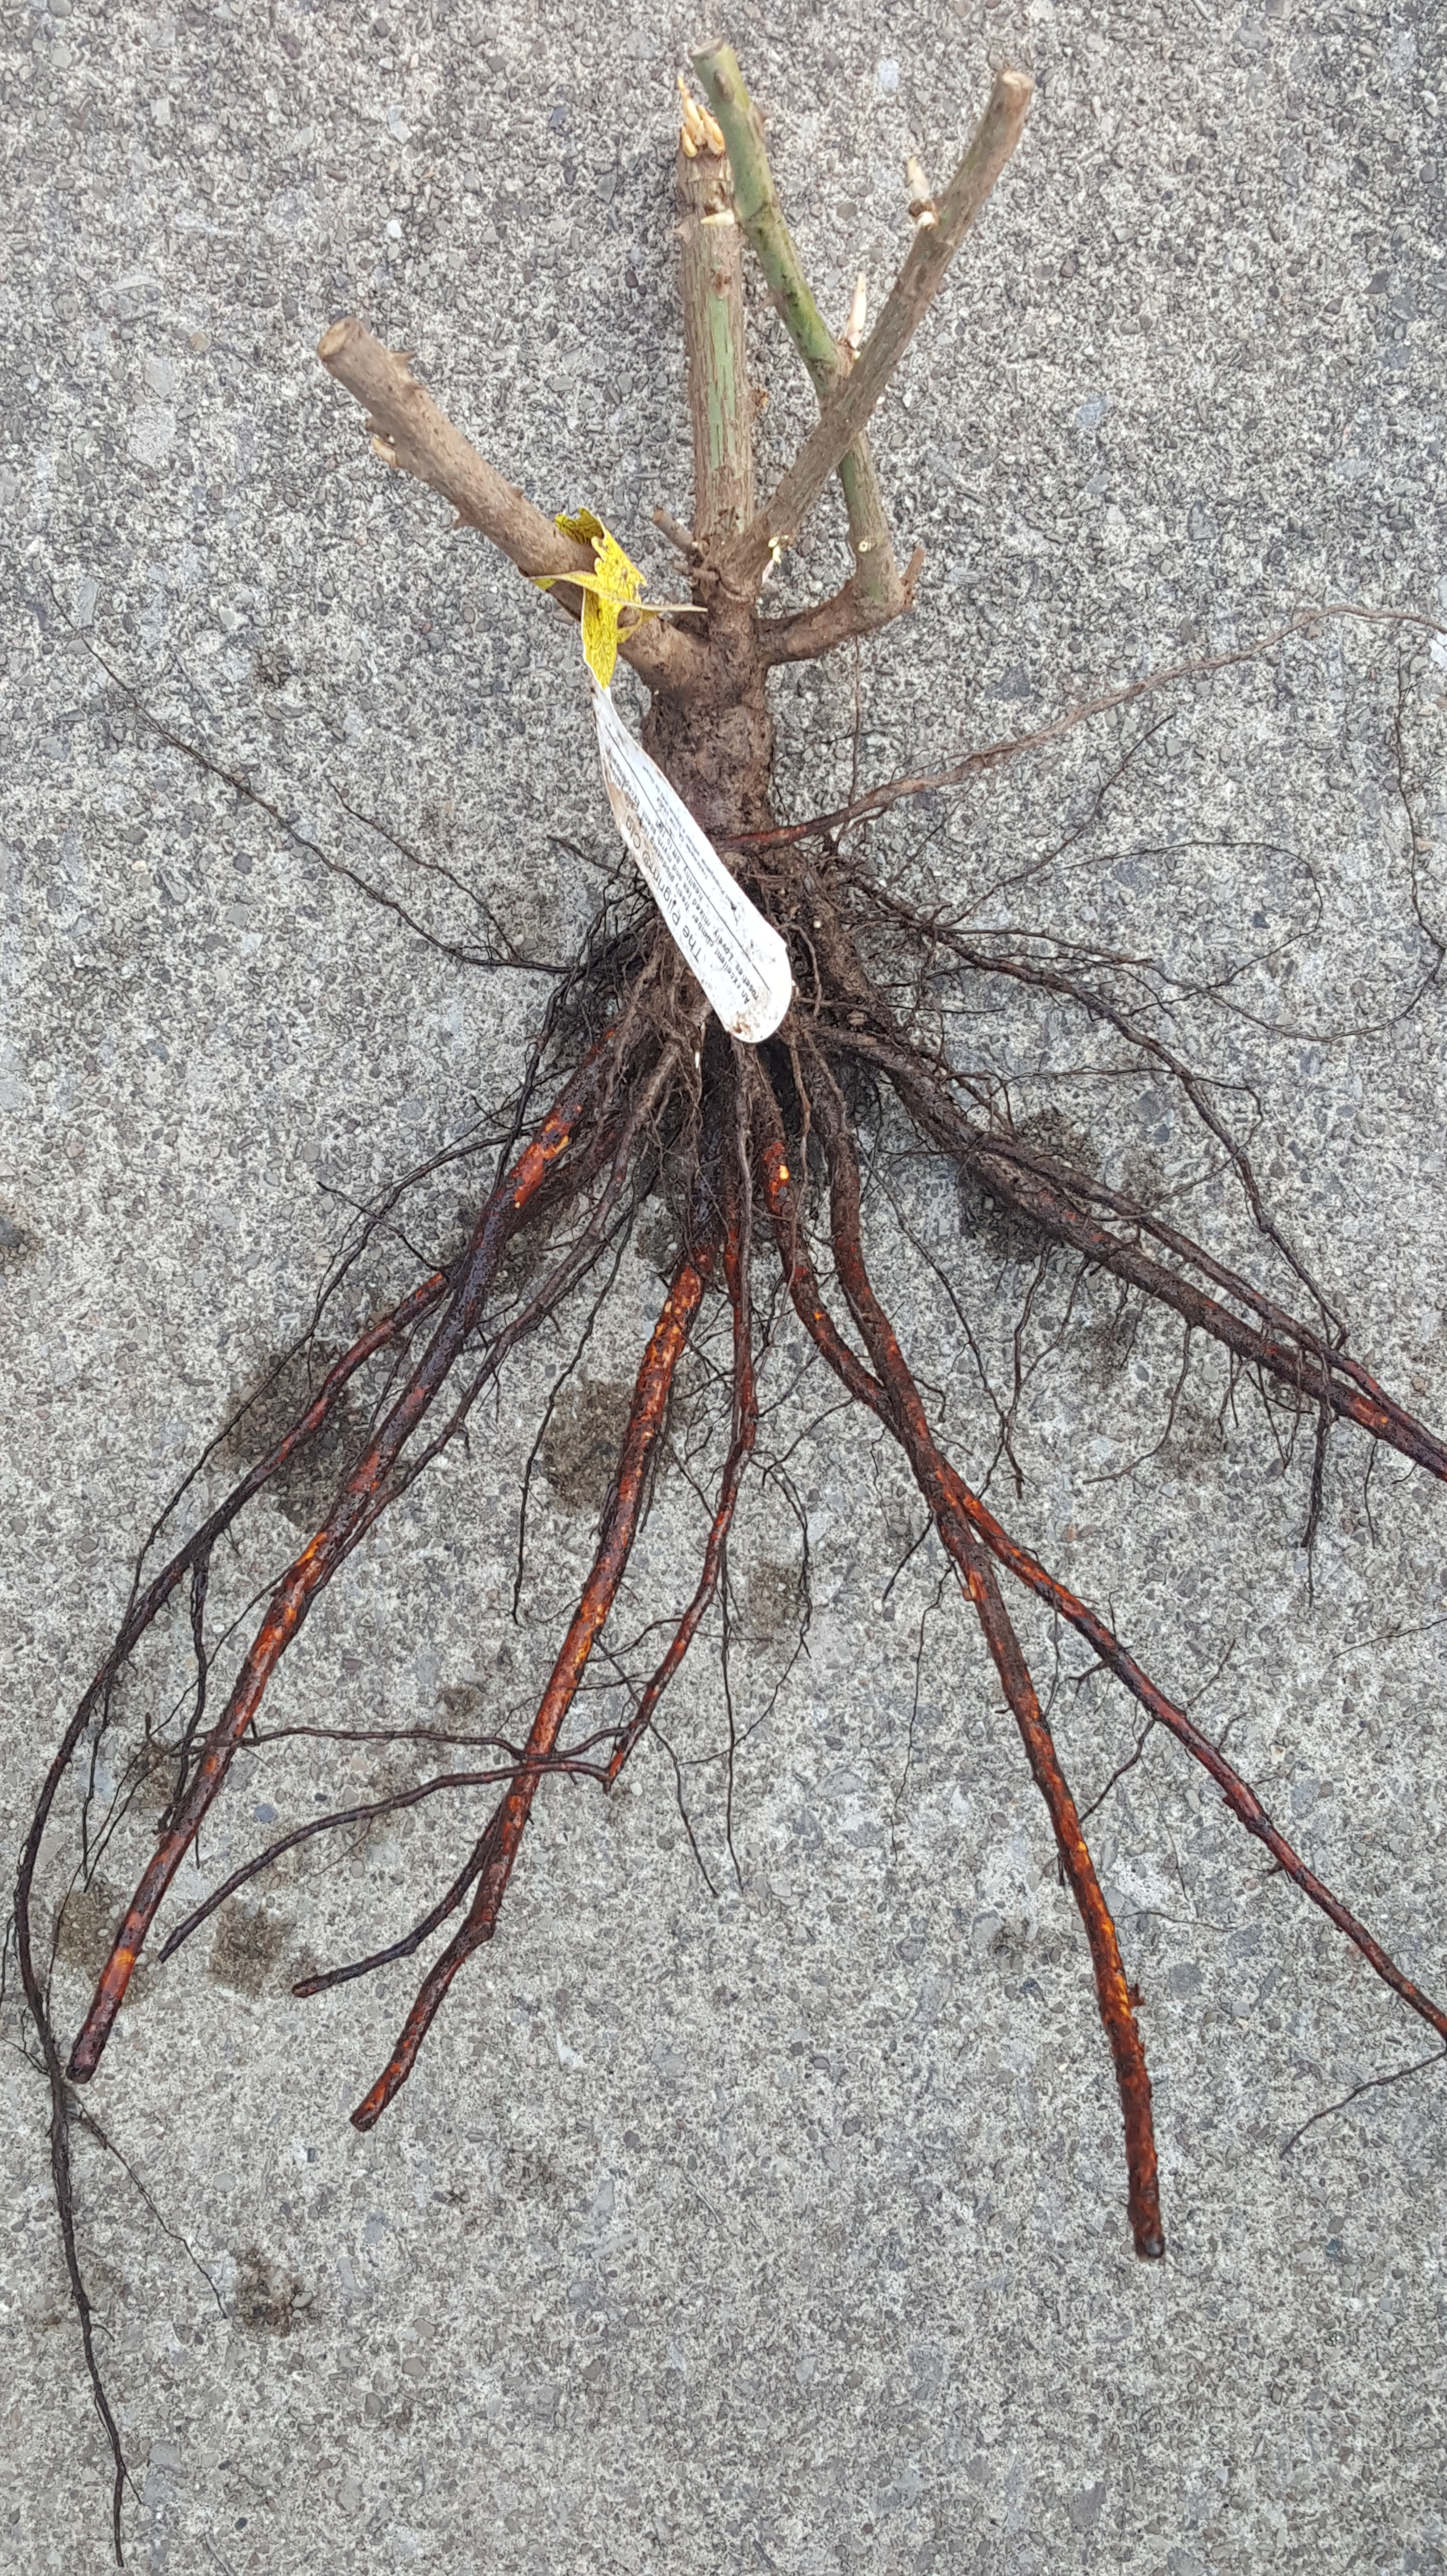
I got the rose on the Thursday before we went camping, and, by the way, it was SNOWING and 30 degrees that weekend. I left the bare root in the box. I called David Austin® Roses USA based out of Texas, the Monday after we got back, and wanted to get some info about my rose, and when I should plant it, considering it was snowing the past weekend–why would I bother until it got a little warmer? The customer service representative was a little snarky with me, saying I needed to get the bare root in the ground immediately, but first, I needed to soak it in water for several hours before I planted it. If you follow me on Instagram, you know my desperate call for help when it came to soaking the bare root– several hours, or several days, or just a couple hours? I soaked mine for seven hours and then planted it.
My first experience with a bare root anything!!
Thanks in large part to the David Austin® Roses website, which, I highly recommend visiting, because it is an extremely easy and informative website to understand when it comes to everything roses.
So, what has this rose-growing novice learned so far?
Bare root roses need to be soaked for hours (that could be anything from 2 hours to 2 days, everybody has a different preference), so it can be re-hydrated before it is planted in the ground.
Make a hole large enough to fit the large root system of the stem. (You could go with the usual rule for any plant, make a hole twice as large as the plant).
Give your rose some room to grow– make sure it is not competing too much with other plants. Hmmm…I think my plants might be a little closer than they should be, but hopefully it won’t be a huge issue.
I am happy to report that so far, so good. My bare root has buds on it, and they are growing. I will be giving a full report and time goes on and as I learn more about roses, and what I need to do to keep them alive! I honestly never thought I would ever grow a rose, so the fact I am actually doing it now is very exciting to me.
Stay tuned for more info. I hope you all weathered the long winter well!
The past few weeks have been very productive around here! Painting, yard work and buttoning up the little things before the snow starts flying next week! This weekend was a treat, because I took a break from doing any major house work and got outside while the weather was nice! A quick trip down to my parents house, along with the usual hike around the woods always makes me happy! Those of you who follow me on Instagram have already seen this photo, but I couldn’t help myself– I had to post it as a “Natural Pause” because I was pretty happy with how it turned out! Enjoy!
Is it me, or do the days get busier and faster? This fall has been wonderful, and our days have been filled with the usual day to day work schedule, along with all the other things that have helped our weekends go by at warp speed– weddings, birthday parties, pumpkin picking, walks, bike rides, etc. I have also been busy doing things around the house as opposed to any garden work. I got some necessary painting done, along with organizing the house, while the weather is nice.
Now I am back to the garden, and I am so happy to be– it’s been another spectacular weekend here in Western New York, and I really don’t know how much longer we will have days that are 70+ degrees. Fall garden prep is underway! I have been collecting seeds as much as I can, but also need to work on some other very important parts of the yard. My front yard and flower beds are in desperate need for improvement. My garden plan for next year includes revamping the front yard and foliage. I seem to have some serious problems with things doing well in my front beds. With last year’s house remodel and other things going on, I haven’t given them enough attention. I need to start from the ground, up (Hehe) — I need to spoil my soil!
Since we sank our toes into veggie gardening this year, (tomatoes, and some gourds from seeds of last year’s gourds), I have been learning more about soil and how important it is that it is healthy for the sake of not only your veggies, but your plants and flowers as well.
Soil contains many beneficial bacteria and organisms that are vital to everything on earth. Sometimes it needs a little boost:
Time to turn it up. I use a garden hoe or a spade and turn up my beds to bring up some of the good organisms to the top to revitalize the soil.
Give it some help. Add more fresh top soil, manure, peat moss, compost to your existing flower beds to give it the health it needs to keep your plants and flowers energized during the growing season.
It doesn’t cost much. Top soil, mulch, compost, etc. does not cost a lot, so if you are on a budget, this will definitely not break the bank!
I decided this year I needed to add some composted manure to my front beds. Every other year I usually add top soil, but I thought adding manure to my existing soil would give my beds a good boost of nutrients for a healthy, bountiful growing season next year!
I am using a bow rake to level out the manure I added to my flower beds.
My large front bed also got a few allium bulbs added to it. It seems too bare out there! I need more of a four-season feel out front of the house, too!
New layer of manure and new bulbs will make this bed look a little more full come spring!
Happy fall prep to you all– what do you do in your part of the world?