Waiting out the ice storm and having tulip dreams of spring. Enjoy.

Waiting out the ice storm and having tulip dreams of spring. Enjoy.
My soul is mourning. That’s the only way to describe it. My grandmother, Joyce, passed away Thursday evening at 84 years old. She lived a full life, and when I saw her in December, I could see in her eyes that she was not long for this world. But still, after hearing the news of her passing this past Thursday, the news completely knocked the wind out of me. I guess the absoluteness of the situation still shocks you even though you know it’s coming.
I grew up a country girl who didn’t have much– but I always had what I needed- no more, no less. What I did have a lot of? Family. I was blessed with pretty much all of my family living on the same road in the same rolling-hills valley. For the first part of my life, I had three grandparents– my father’s mother and both of my mother’s parents. My grandmothers were the loves of my life. In the late nineties, I lost my father’s mother, Mildred and my grandfather, Bob. My first broken heart was not from a boy, but my grandmother dying. She lived right next to us, and she was so sweet and wonderful. I was constantly picking her flowers from the daffodil patch on the side of the road and she loved it. “Bless your heart”, she would say.
I am an extremely sentimental person, and I am not afraid to admit it. When I moved into the house I live in right now, I wanted a little bit of my grandma Mildred in my garden, and I planted some of her favorite flowers, peonies and narcsicuss’. I was happy to get some of her iris bulbs from my father last summer. These bulbs are close to 50 years old, and I am really hoping they come up for me this year.
While grandma Mildred was the finest example of what a grandmother was and should be, grandma Joyce blows that ideal out of the water. WAY out of the water.
My mother’s mother, Joyce, was in no way, shape or form like anybody I had ever known. That still holds true to my 35 year old self today. While you think of the typical little grandmother as being sweet and lovable, who knitted sweaters and baked cookies for you, Joyce did not. She was a old-school country woman who was brash, loud, and as lovable as a cactus. She could be downright embarrassing (ask my mother). It wasn’t her style to show affection. She drove a truck (and fast to boot). She was a tough old broad who said what she felt and didn’t fake anything. She was honest, eccentric, and what some might even call, a little bat-shit crazy. The irony of this all, is that these attributes are what made her so damn lovable.
My grandma Joyce was the original, genuine bad ass. She would pass people on a side street if they were going too slow. She would pull over on a treacherous dirt road in the middle of a thunderstorm to pick up an empty beer can just to get the 5 cents. I watched her rip a nasty snake in two pieces with her bare hands. This woman was freaking awesome.
I challenge anybody who knew my grandmother that didn’t deep-belly laugh when they were around her. You were always guaranteed to laugh in her presence. She lit up the room she was in, and anybody who was in a bad mood was no longer when she came around.
In the early years, every Sunday my siblings and I would go down to my grandma’s house and play kickball with my cousins and even my uncles at times. We would eat all her food and drink all of her milk. Grandma’s house is where I cultivated my love for black licorice and cheese curds. And she really did love having everyone around. She had 7 kids, and 16 grandchildren, so the front door was always slamming, and that drove my grandfather crazy.

Grandma’s House is where I spent a good deal of time during my childhood.
As the years went on, I would continue to go to my grandmother’s house to visit with her. Unlike my friends and other people I knew, I didn’t go over to her house just to get money or something else of value, I loved talking with her. And I did that for years. She was my buddy, and I was her confidante. She talked to me about everything. I was her ear. And through those conversations was how I learned just how kind and compassionate she was. She was a genuinely good person who was just as vulnerable and sensitive as anyone else. Her tough exterior was justified. Life had not been too kind to my grandmother, she endured great loss, and lived with a broken heart for almost 50 years.
Like any great love story, there is always a rough patch. We did have a falling out for a few years, but we came back around just at the right time. I am so lucky to have had her for a grandmother. I just loved her. And I will continue to. Behind my mother and father, she was one of the single greatest influences on my life, which ultimately molded me into the person I became.
So, as for flowers or plants I should plant for her? That is still up in the air. Maybe I will ask my mom if she had a favorite. Grandma wasn’t a gardener–she didn’t have time with 7 kids. If she doesn’t know, I am sure it will come to me. I wouldn’t be surprised if grandma herself doesn’t bonk me over the head with something she does like.
Don’t be afraid to let your garden tell your story. A little bit of your past, present and future is what makes it so grand.
Rest in peace, grandma. I will never forget you.
I hope everyone is having a great week. I just got my seed catalog in the mail the other day, and I am having a blast looking through it! Even though it really hasn’t felt like winter this year at all– no cross country skiing or snowshoeing — I don’t mind– the mild temperatures and actually being able to go outside and walk has been a plus for sure!
I am always looking for and researching topics that are informational and helpful to not only me, but you as a gardener. One of my first few posts I ever wrote was about growing zones. Even though we are on the home stretch and spring is right around the corner, I thought this article about winter gardening and your grow zones would be something to get you thinking about next year.
I would like to thank the people from over at fix.com with this great article that explains things a lot better than I could right now!

Too much time has gone by without a post– these new working hours do not leave much time for me to formulate a decent blog post!
Currently, I have been waiting for a seed catalog I requested– Baker Creek Heirloom Seeds. I just recently heard about it through Twitter from my fellow gardening friends. I heard it is a great catalog and I can’t wait to get my hands on it! My husband’s co-worker gave me a couple of seed packets and I would like to look for some others. I have to admit, this winter feels like it is going much faster, given the fact we have not received nearly the snow or have had to deal with the sub-zero temperatures that made last year’s winter so darn long.
So, as I sat at work yesterday, an idea came to me. I thought I would start a new mini- series that would lead up to the upcoming growing season– I call it “Consider This”. Giving a little snapshot of certain plants/flowers/shrubs/trees that you should consider planting in your garden and/or yard if you are able to! I won’t do it every week, but as I go along I will pick out a few different botanicals that should be given some serious consideration to your landscape.
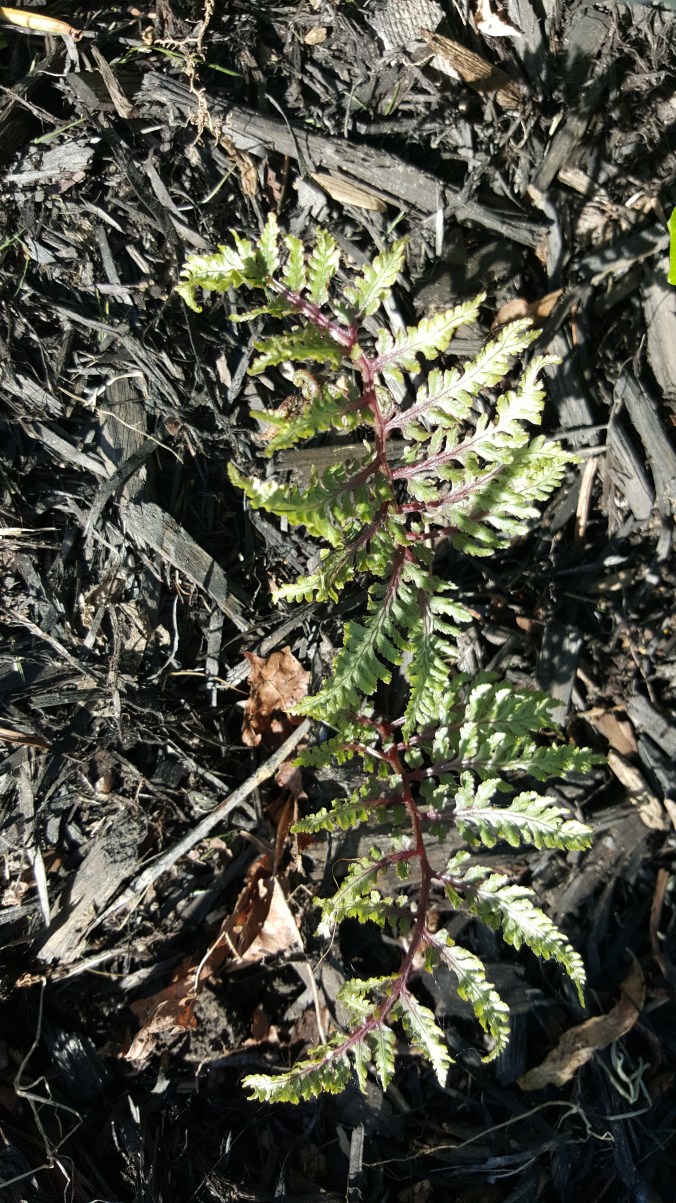
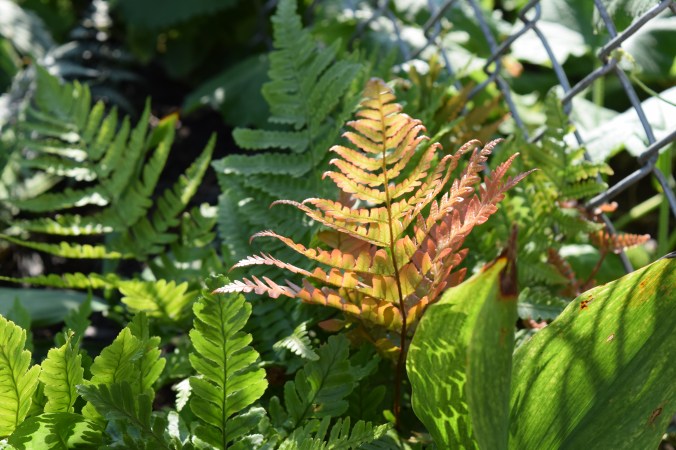
My first plant I am going to highlight are ferns. I LOVE ferns. I try to get my hands on as many varieties of ferns as I can. The simple, elegant beauty that comes from these plants cannot be emphasized enough.
Here are some quick facts about Ferns:
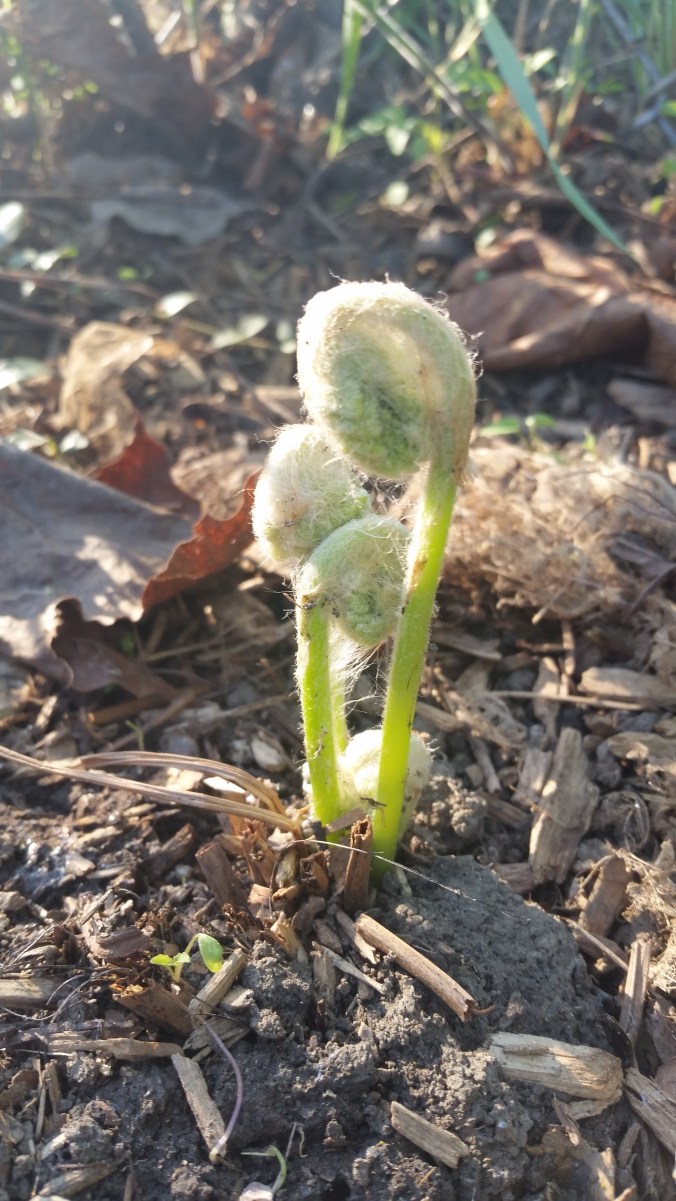
Ferns are a woodland plant, so they thrive in shade. There are several different kinds, as I have stated above. I will give you the list of the ones I have collected over the past few years:
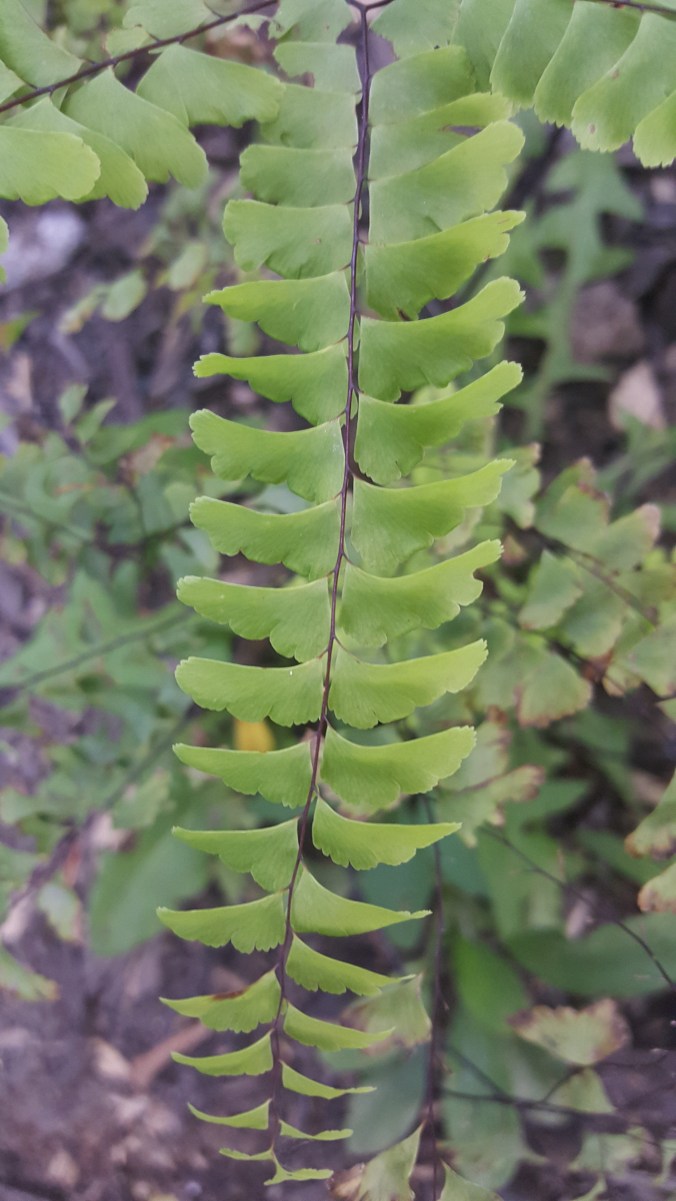
Maidenhair Fern
Japanese Painted Fern
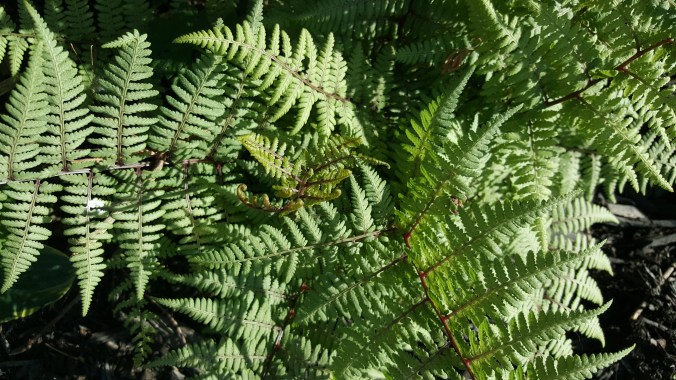
American Lady Fern

Cinnamon Fern
Autumn Fern
Yes, as I said above, this is just a snapshot of the many ferns that are available. I absolutely love ferns and have always wanted to do a post all about them. I hope to keep adding to my collection, as long as I have shade, I will keep buying them!
Thank you for taking the time to read this long post!
I have been slacking big time on getting posts out in a timely manner. It just hasn’t been happening because Life happens. Work, kids, family, etc. Lots going on, and that’s not a bad thing! We did finally get some snow this week. I live north of the city, and we never get anywhere near the lake effect snow that the city and south towns get. It really does depress me, because I like to play outside in the snow! Oh well, we are forecasted to get some starting tomorrow, so here’s hoping for a few inches!
My company now allows for flex hours, and I go into work an hour later and leave an hour later. My nights are already pretty compressed — trying to get dinner, play with my daughter and then start the bedtime routine. But now as my daughter gets older, I feel like my weeknights are flying by faster than ever. So, I have to admit I have been neglecting my indoor plants a little bit. Last year I was learning about my plants and wanting to purchase more, but time seems to be lacking for me to even really get excited about the whole endeavor. I wanted to change that!
I purchased something before Christmas that I never really EVER thought of buying. I mean, I see it on TV all the time around the holidays, but you never really buy the thing, do you?!! Yes, I did.
I bought a Chia Pet. But not just any Chia Pet. The Jurassic World version of the Chia Pet. And of course, it was my daughter who wanted the thing, and of course, I bought it.
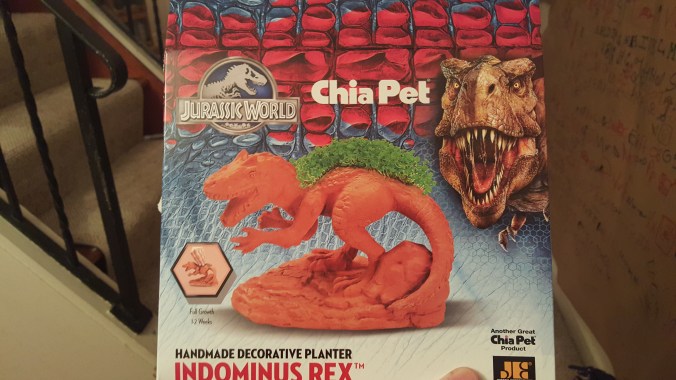
It also didn’t dawn on me that the “chia” in Chia Pet meant the chia seeds I put in my overnight oats were one in the same!
So, I followed the directions, and put the seeds in a quarter cup of water and let them soak for an hour. After the hour, you can start spooning/basting the seeds on the clay form. I tried to spoon them on the top like the picture, but it didn’t work so well for me. (Note: I accidentally threw out the plastic tray that came with the Chia, so I had to use one of my baking dishes.)

Ok, so obviously mine did not look pretty. Big shocker, it looked nowhere near like what you see on the box. I know this was my first time trying one of these, so I gave myself a break and just let it be.
Now it says to keep watering it everyday by placing water in the hole on top of the clay form. They said to take the left over water in the bottom and put it back in the clay piece, but that did not happen for me. It was pretty much evaporated every day, and I couldn’t get the seeds on top to stay moist.
But, to my surprise, after a few weeks, the bottom half started to sprout, and I was pretty excited about it.

But then, after a while, even though they did grow well on the bottom half, it started also getting moldy because of the moisture content down there. And on the top like the box shows, NOTHING happened.
What it also says in the instructions is that you can keep using this clay form over and over, but after I finally gave up on the this thing, I tried to wash the seeds off to give it another shot. It was like trying to scrub concrete off something. It didn’t happen.
So, I threw it out. The whole thing. No more Chia Pet. To be honest, I could find many other ways to waste $15 bucks. So, I will just stick to enjoying the holiday commercials.
Happy New Year to everyone! I hope your holiday season was wonderful! As always, it’s over as fast it comes. It was a whirlwind December at work, (as usual–always choatic at the end of the year), and with pretty much the first half of the year supposedly just as crazy, I thought I would concentrate on some small indoor projects that hopefully keep my sanity in check!
Christmas in our household was wonderful. My daughter got everything on her list from Santa. The only thing we didn’t get was snow.

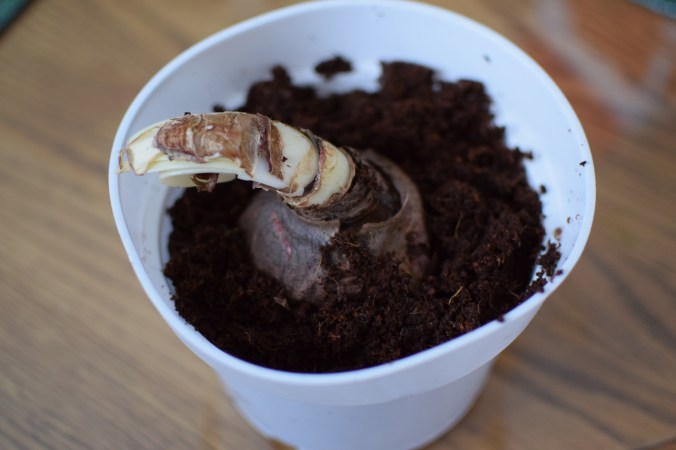
After 8 weeks of germination, the apple seed my daughter brought home from school has finally been repotted. I hope it becomes a seedling in a couple of weeks.

Here’s hoping something starts sprouting soon!
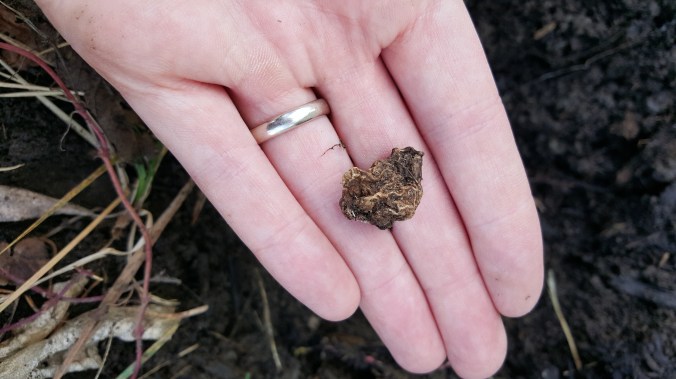
I also purchased two amaryllis bulbs on clearance at the store right before Christmas, so I decided to try and see if they will blossom for me now. These two were a little different from the amaryllis I potted last year. I had a disc of dry medium in the box, and I had to add two and a half cups of water. It became dirt right before my eyes! LOL

Warning: This is not brownie mix!
So, here’s hoping they bloom for me!
The weather was warm right up until Christmas, and then this past New Year’s weekend, it became cold, snowy and windy. We really only have a dusting on the ground, but the wind chill really gets you!
Now is the time to start sketching out your garden plans. What do you have in mind? What are some of the projects you would like to complete this year? Stay tuned for my list!
That December sun. The sunset tonight was out of this world. You don’t see it that often around these parts of the world at this time of year! It kind of sums up what the weather has been like for us in Buffalo. Milder than normal temps which resulted in another record broken for us– the longest we have gone this time of year without measurable snow!

So, you really can’t do anything but take advantage of this weather if you have any last minute yard/garden work that needs to be done. I have been busy with a lot of different things, so here are a few things I accomplished on this 50+ degree weekend:
Remember, you CAN plant bulbs right up until the ground freezes. Even if that means December 5th!


I put a few ornaments on it, but not too many because I have two cats who are a little too curious…

Nothing has cost me a lot of money– it’s amazing what a little creativity can do for you! Using your own houseplants and containers from outdoors this past growing season can be used in what I like to call “transitional decorating” — from the holidays to winter. I always like to keep some kind of decorations up all winter because it can get a little dreary without some “cheer” around the house.
I have a special decorating post I have in the hopper all about one of my favorite things — Feather Trees! So, until next time, Happy December!
It’s Thanksgiving already, and I know I have a lot to be thankful for. I am particularly thankful for the weather we have been having– a little cold, but no snow just yet (Thank you, El Nino).
I am also thankful because it’s this far into November and the ground has not frozen yet, which means you can still plant spring bulbs! Most places have slashed prices over 50% off, which means you can still spend some time outside before the weather really starts turning.
So, how about you #optoutside this Black Friday and get some bulbs in the ground rather than fighting with the crowds– there will be deals throughout holidays, but time is precious when it comes to playing with your garden!
I hope everyone has a very Happy and Safe Thanksgiving!

These Anemone bulbs will be planted the day after Thanksgiving. Much more relaxing than fighting the crowds! (Special thanks to my husband for making this turkey out of my new bulbs!)
While the winds and rain swirl around us, I am hunkered down inside trying to get all of my plants that I had outdoors all summer ready for hibernation. I am also drying the lone sunflower head that made it this year through some pretty massive summer storms. I love the the uniform pattern of seeds still in the flower! Enjoy.

Happy November! I know that Buffalo has been loving the first week of the month so far– we hit 73 degrees (23 degrees celsius) on Wednesday this past week! Lots of lunch time walks this week just because you never know what the weather will be like in a couple of weeks (November 17 last year it started snowing and 7 feet of snow and 3 days later, it looked like a scene out of the apocalypse).
That being said, I needed to “wrap-up” (pun intended) my gardening to-do list this weekend. Even though the 7 day outlook looks decent, you just can’t trust it this far into fall. So, away I went to get some work done. I detailed my winter preparation in a post last year, but I thought I would go through it a little more this year.

The cover-up begins!
This year, I was a little more savvy than last, so I purchased more appropriate tools to get the job done right (hopefully).
The three things you will need are:
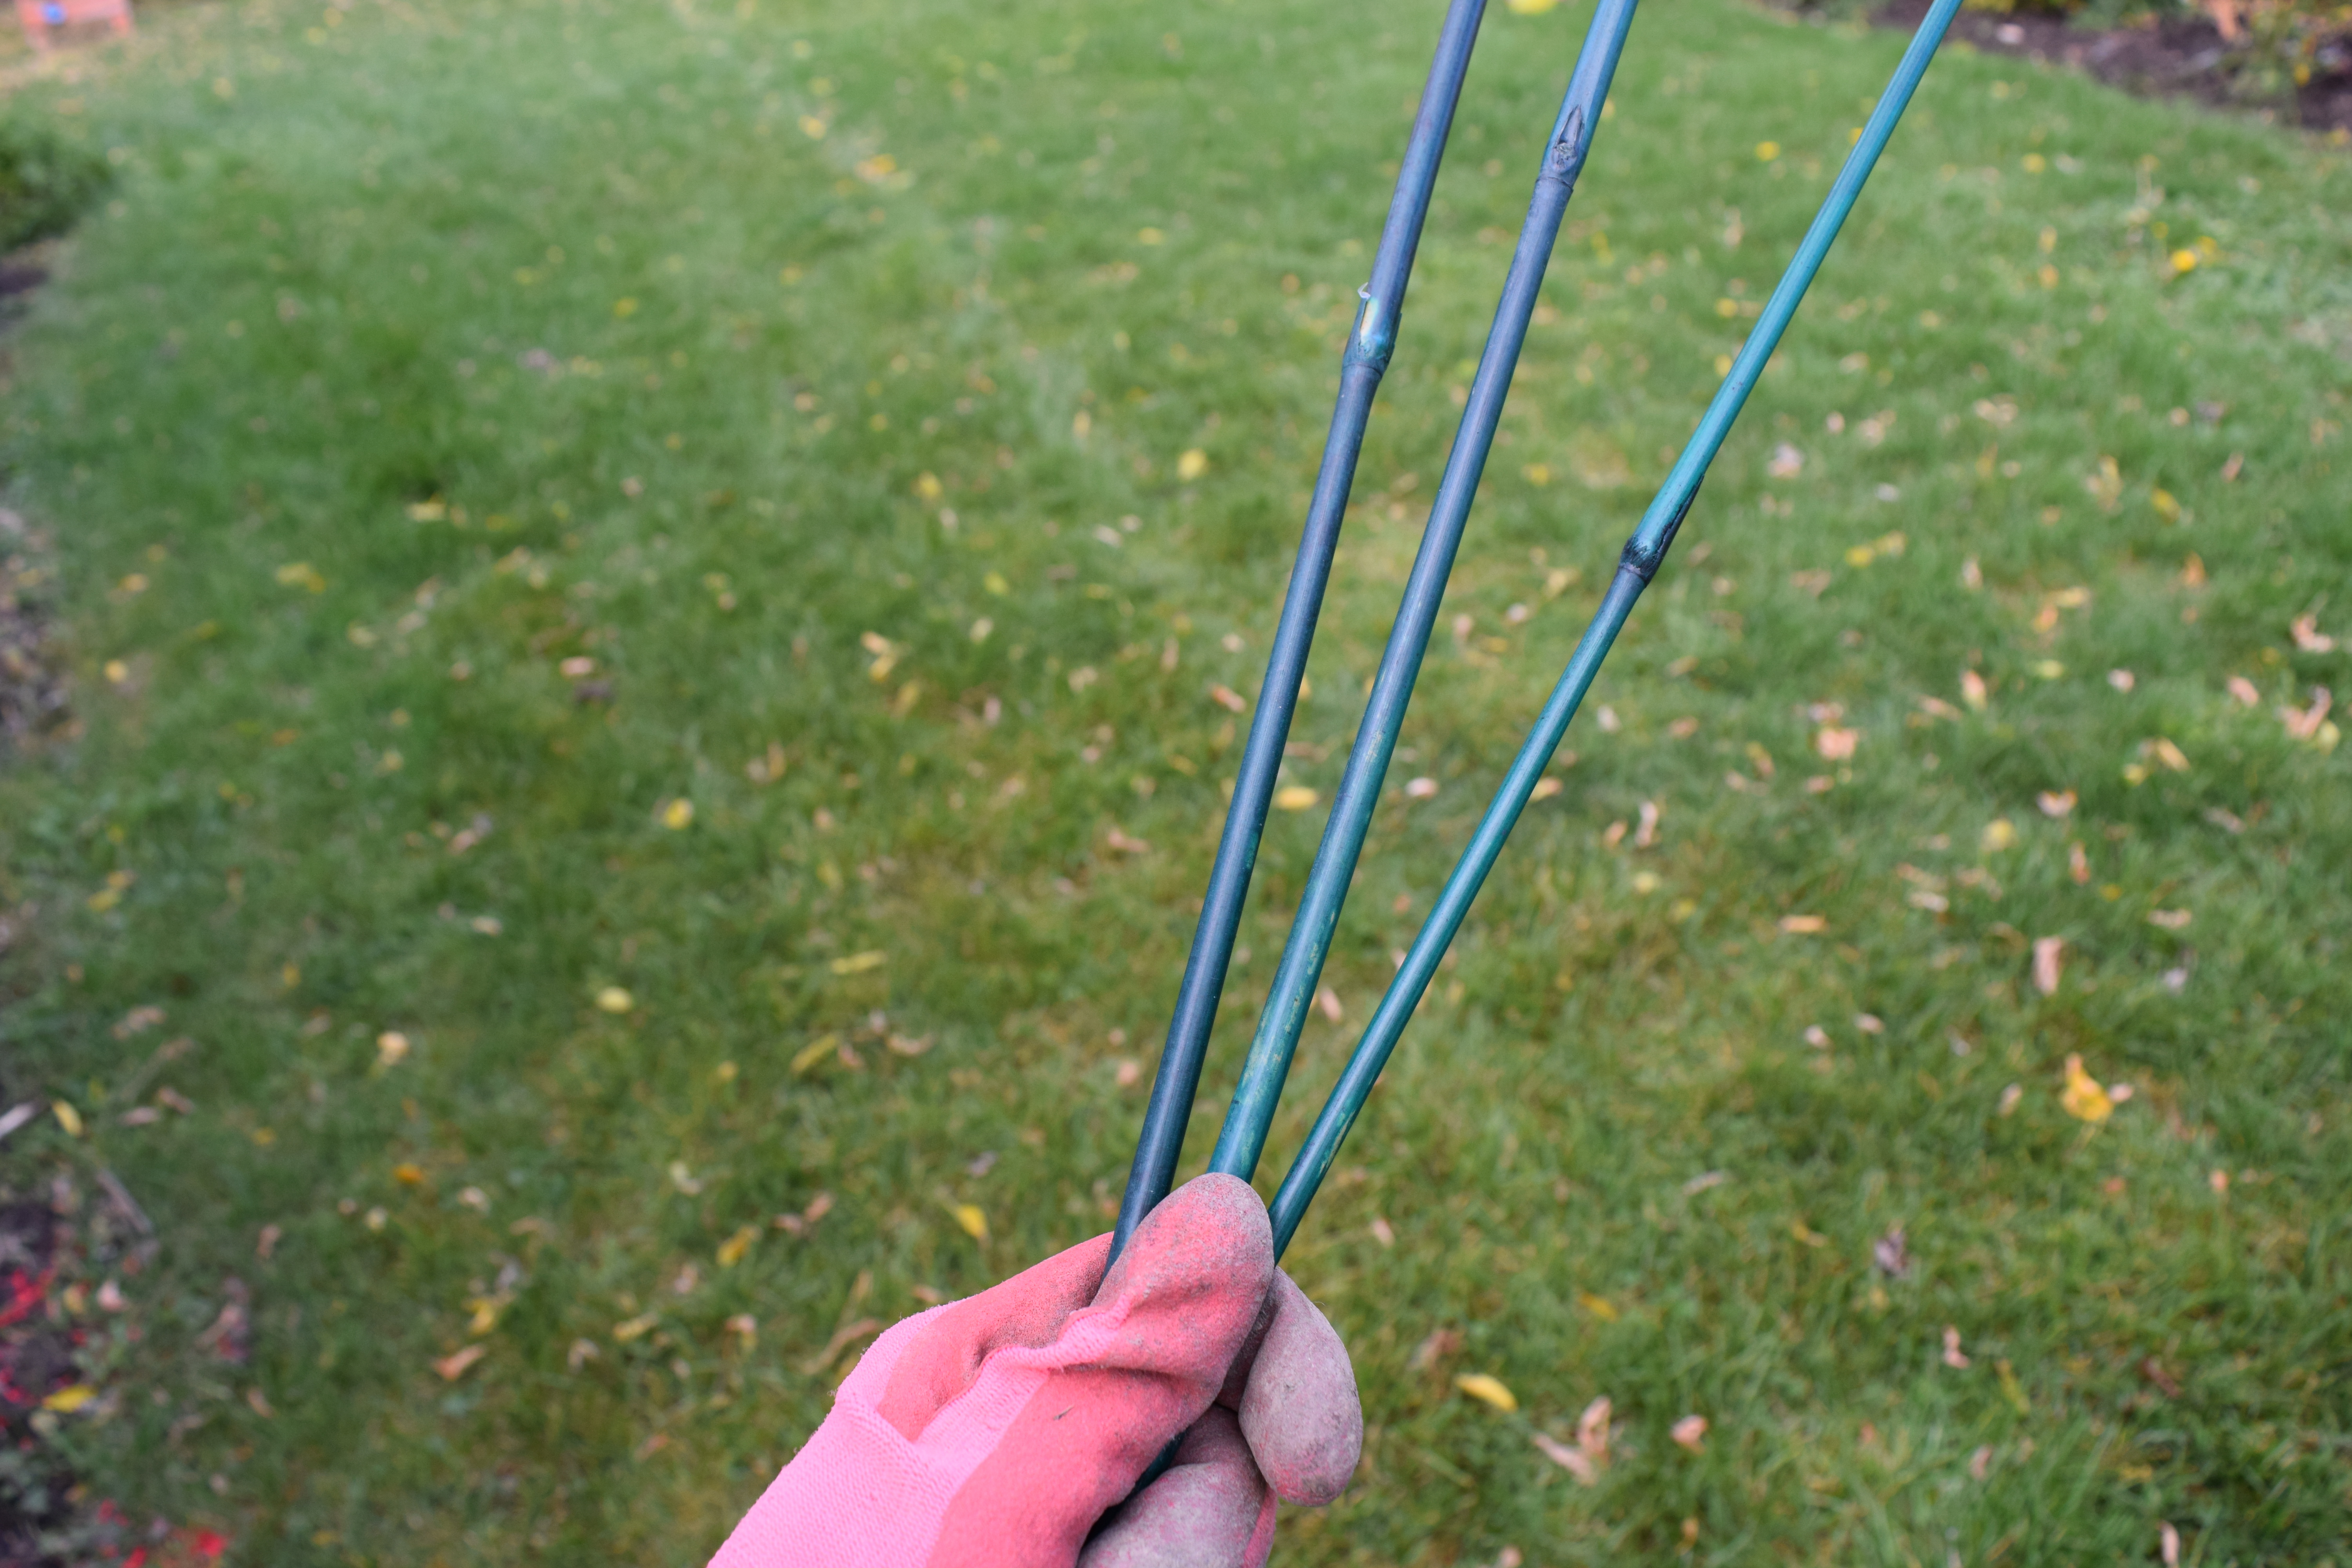
Bamboo sticks are a cheap way to help with your garden winterizing.
2. Burlap – another cheap garden cover that works really well. I remember watching TV last year when a garden expert was pretty much dissing burlap and saying how ugly it was, and to use a more expensive and appealing covering. Who really cares? If it does the job and protects your plants, then go for it. It’s very affordable and I really like using burlap for decorating too.

The smell of burlap takes me back to my childhood– it smells exactly like baling twine!
3. Chicken wire — this will always come in handy, and you can use it when burlap really isn’t an option, especially around trees.

And again, another affordable, more durable covering for your bigger trees and plants.
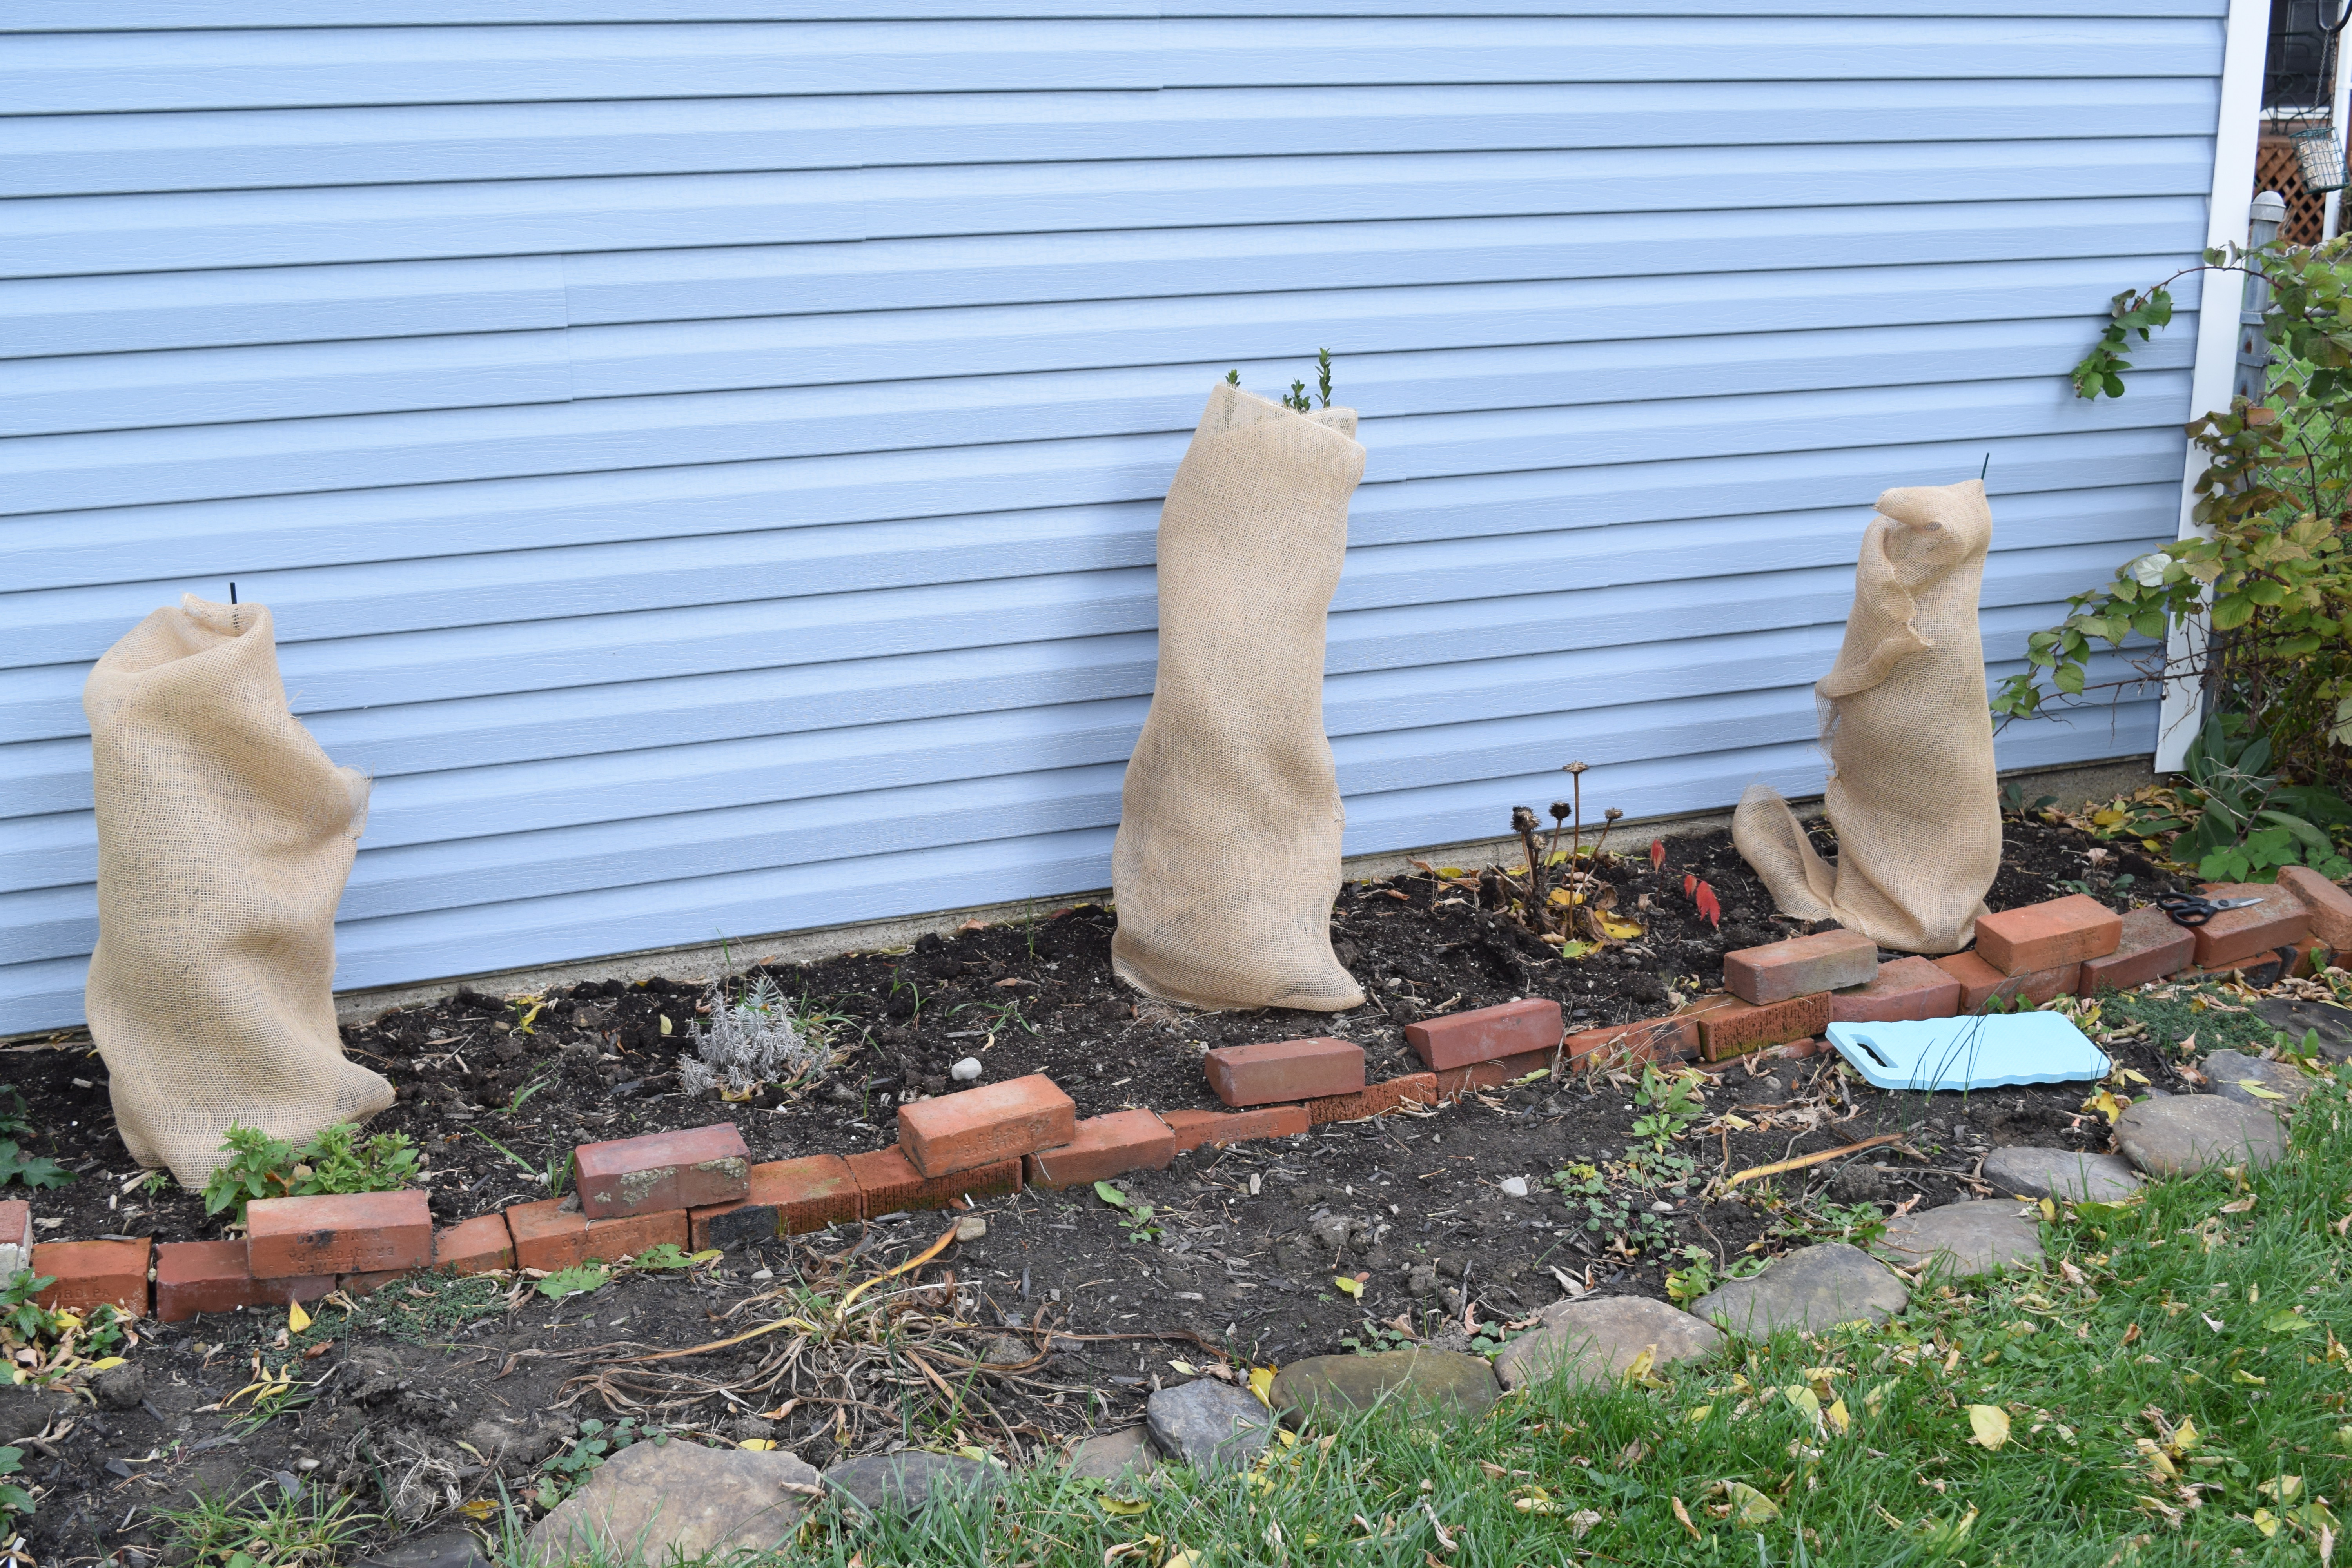
I then went to work. I covered my pencil holly with burlap. I used one of my bamboo sticks as support.

I then took some burlap and wrapped it around the pencil holly, but first I punched a hole in the burlap to give it a more snug hold around the holly.

I poked a hole in the burlap the first time as I wrapped the holly and then I did it again at the end.
For added security and to keep the burlap wrapped tight? I pulled a MacGuyver and I snipped off small pieces of the chicken wire and “pinned” them in several places on the burlap. Now, you can buy several different fasteners and stakes in the store, but I have found that you can use the metal hooks for Christmas ornaments (I buy several packs of these each season– they are so versatile around the house), or if you can find anything or don’t have anything, you can snip off small pieces of chicken wire that work just as good!

MacGuyver would be so proud. When in a pinch, just snip some chicken wire!
Oila! It’s complete! I have three very securely covered pencil hollies!
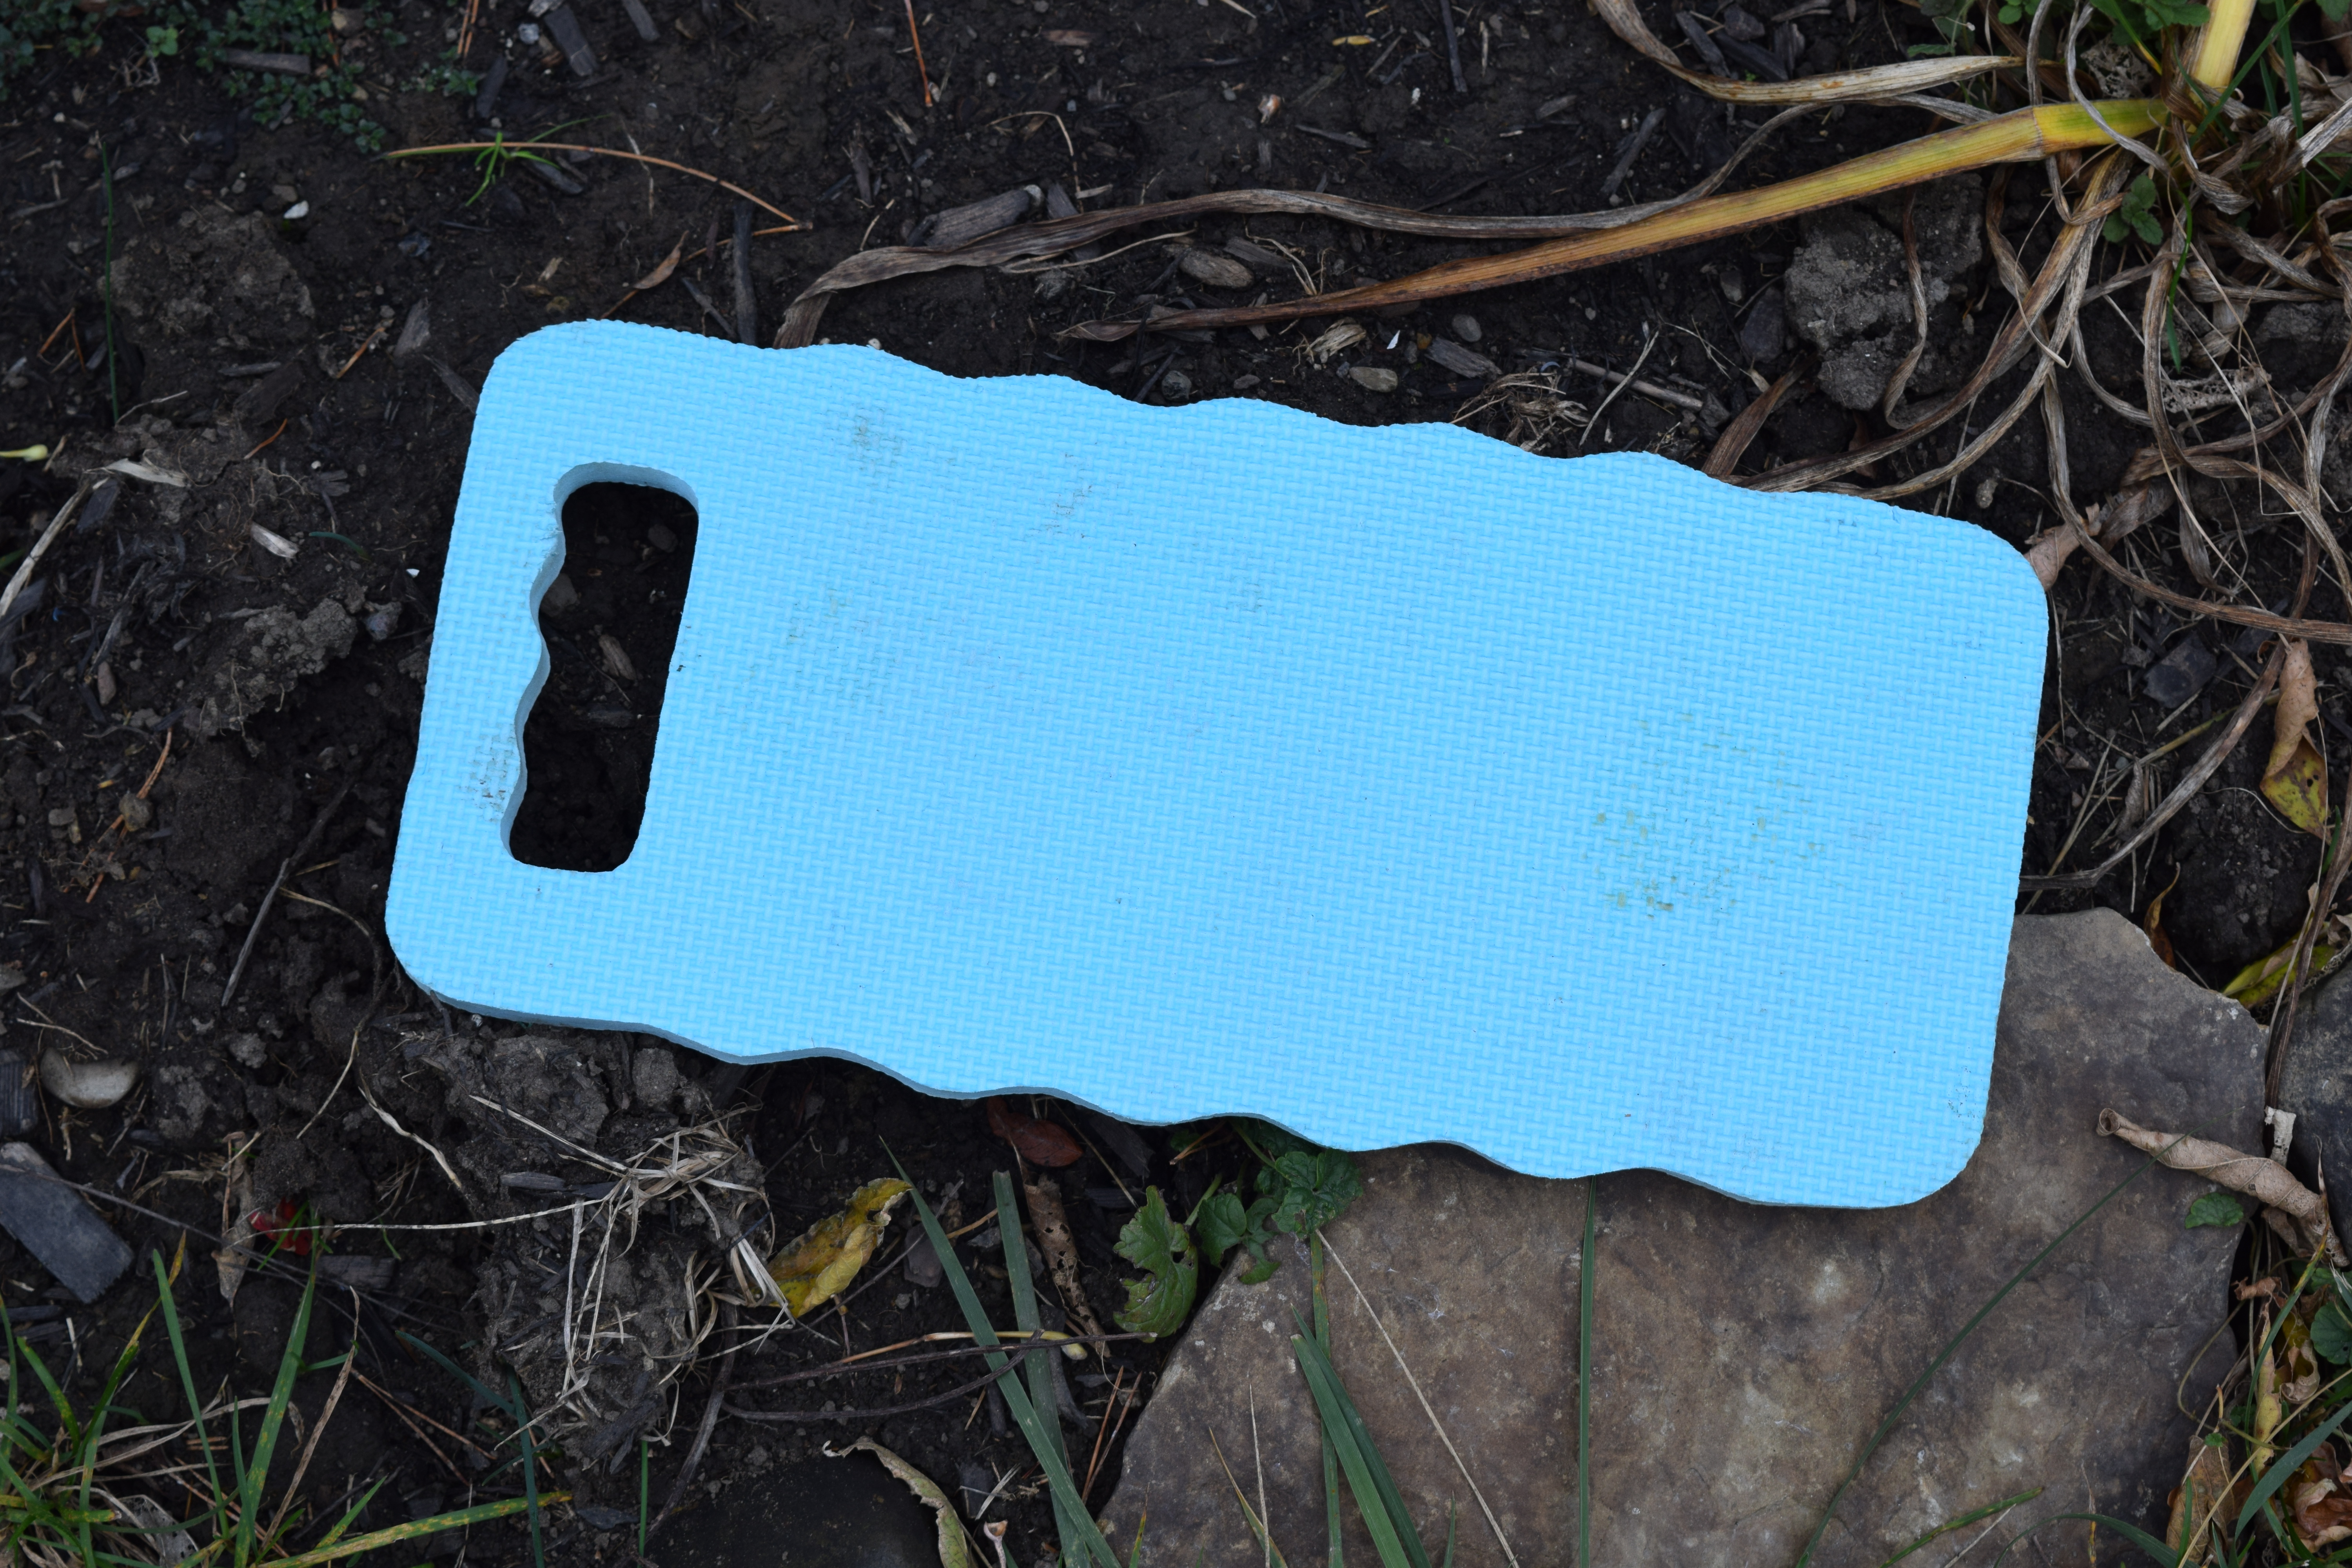
A special thanks goes out to my knee pad — it’s my savior!
Now, it’s time to wrap my badly eaten Japanese Maple. Because it is small, I am using bamboo sticks with chicken wire. It might be also a good idea to use stronger support stakes. I might pick one or two up for added support.
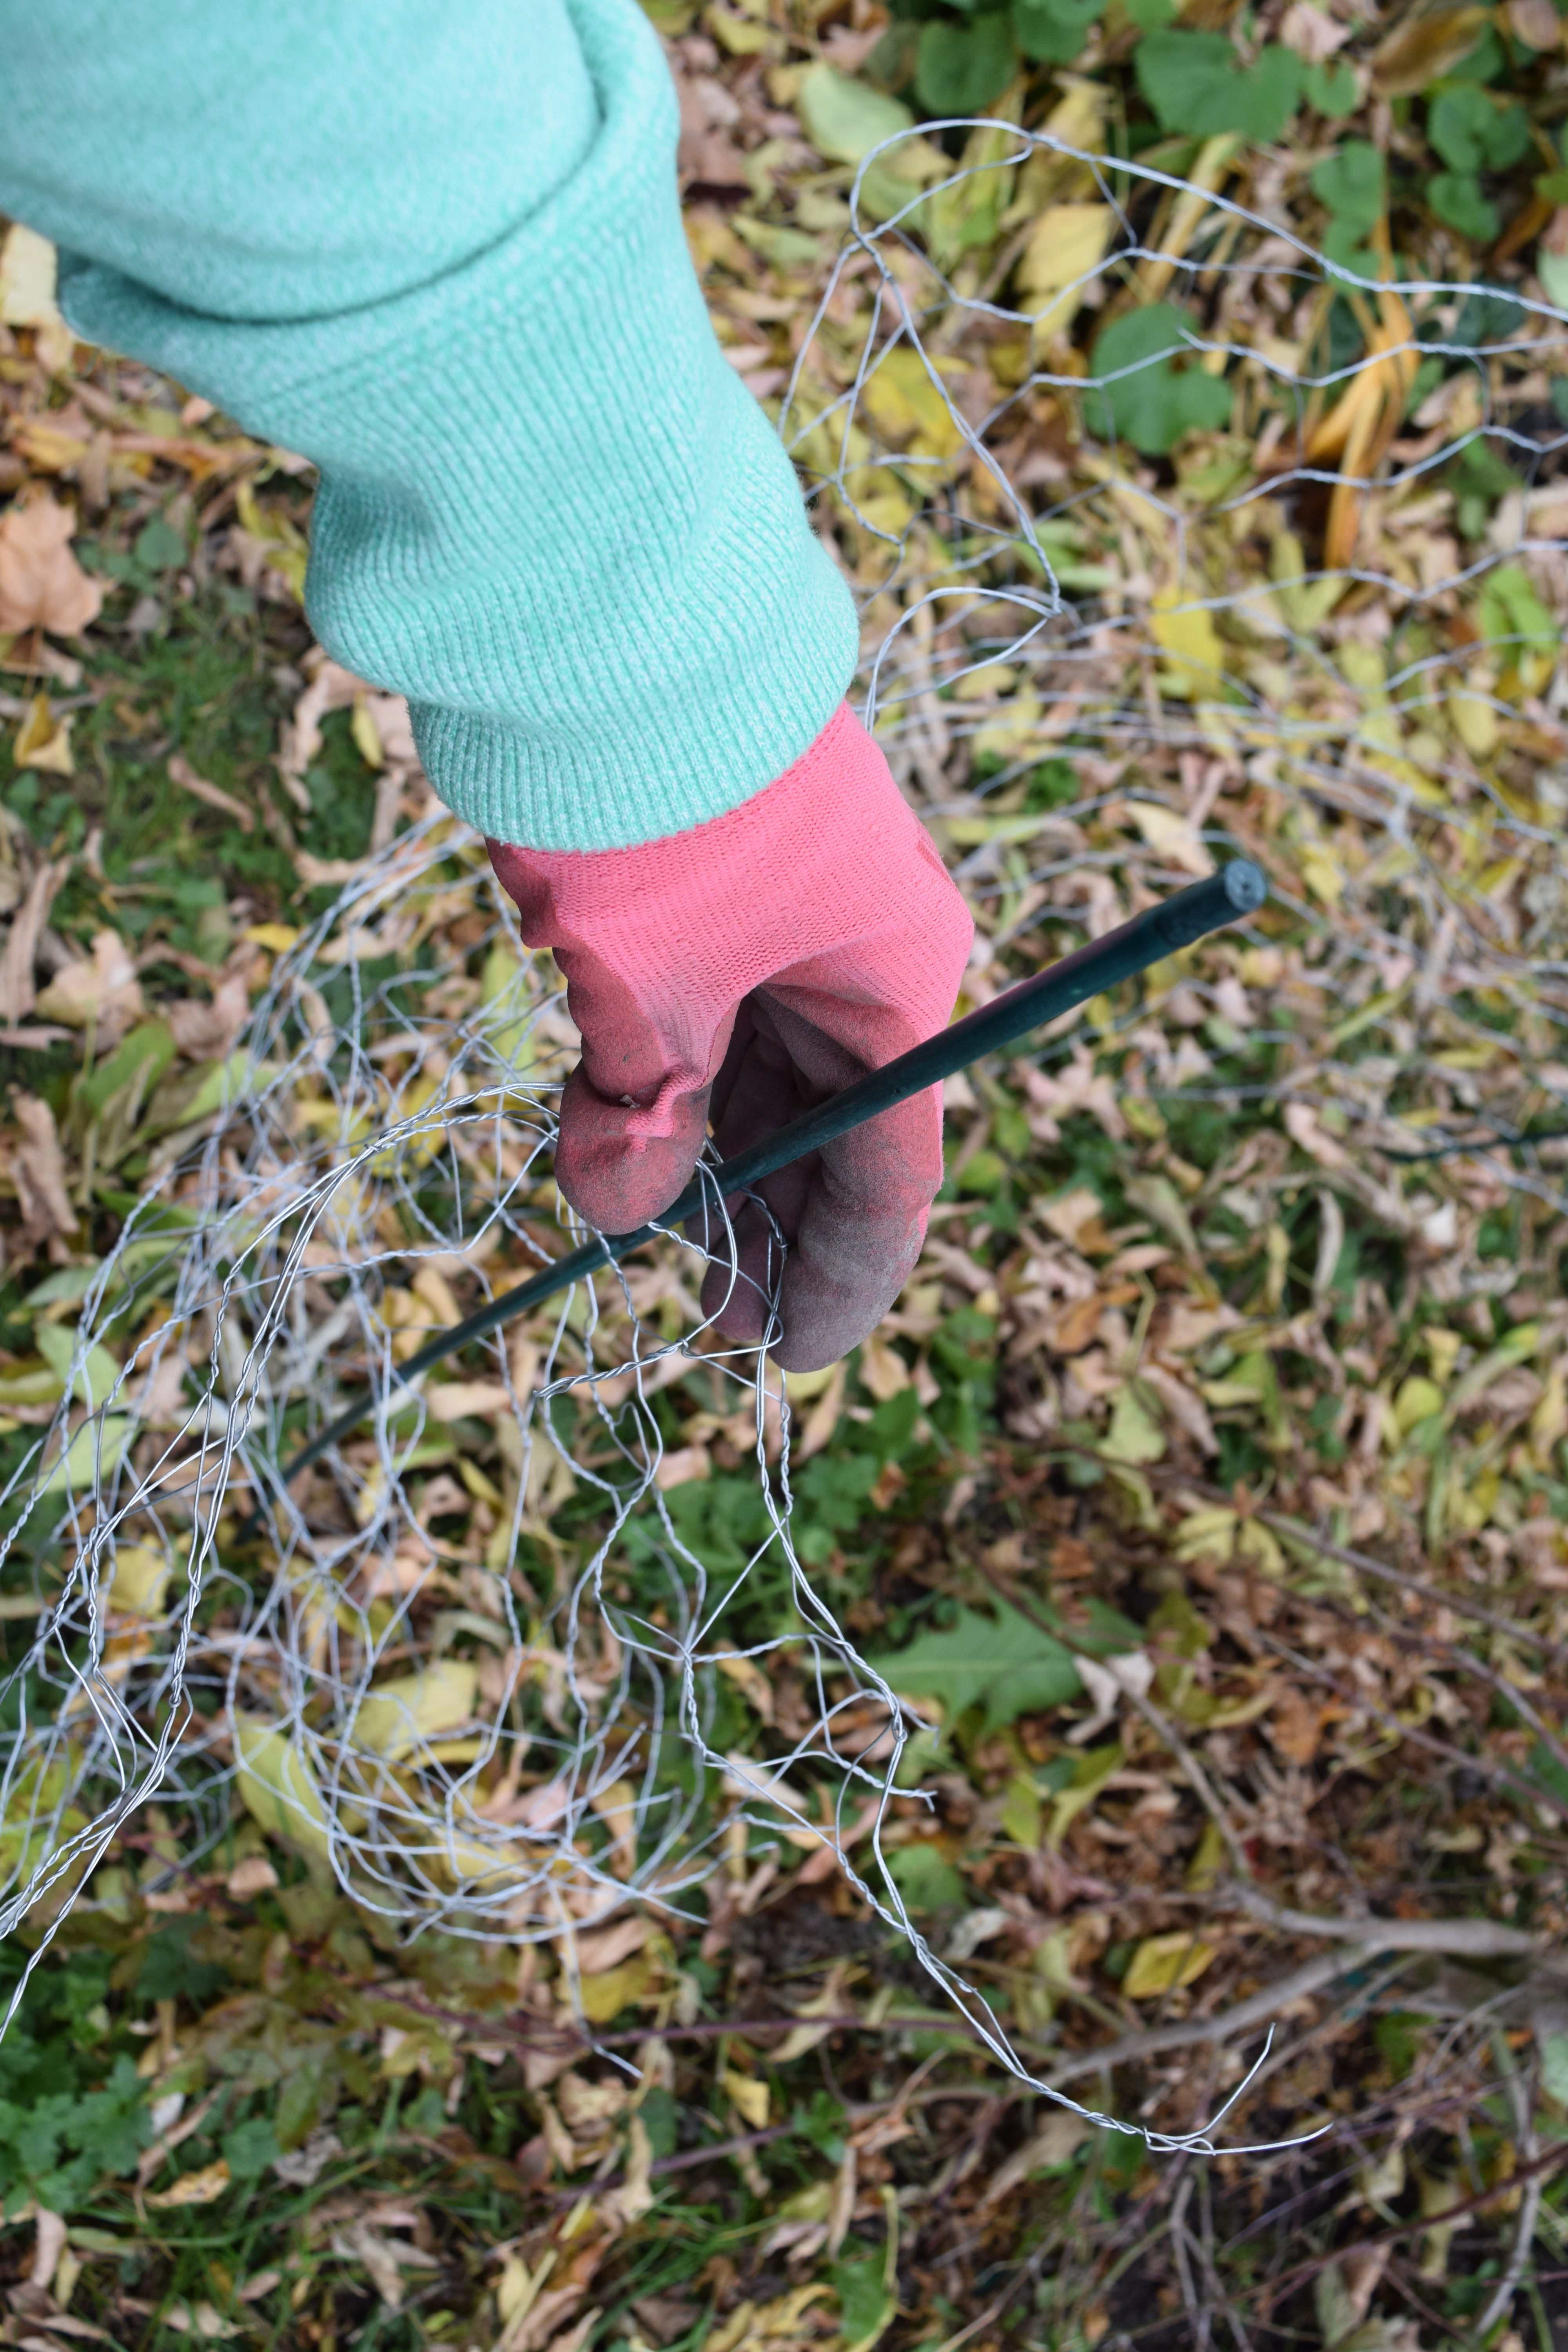
Chicken wire can be difficult to work with, but it’s not impossible. It bends very easily.

And that is how it’s done! I take the bamboo sticks and “string” it through the chicken wire for support. This should be good for my little japanese maple. I am so upset the deer have shredded it.
After the covering is done, it’s time to rake up some leaves, pick up old sunflower heads and cut down my hostas.

Garden rubbish at its best!
I don’t pick up all the leaves–particularly in my flower beds. They are a great winter mulch for them.
So, that was my weekend– lots of work done and now it’s time to start thinking about decorating my urns for the holidays.
**I want to apologize that I never did a post on Fall Decor in my urns. The thing is, the weather has been so warm that the Creeping Jenny and Spikes I have in them are still flourishing, and I didn’t have the heart to rip them out. But, some Christmas decor will be coming for sure!
So, please have a great week, and best of luck on your winter garden preparation!
